

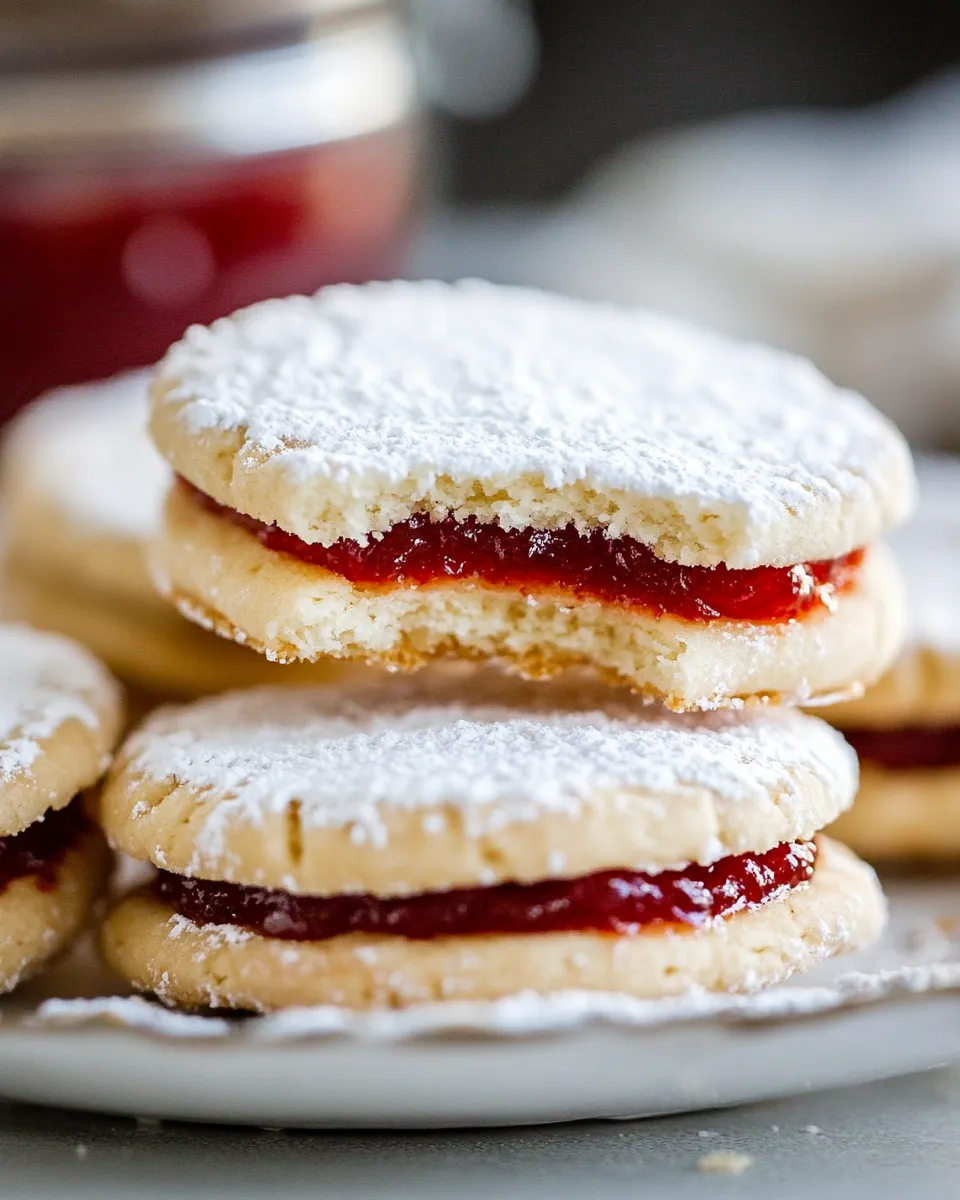
These little jam-filled cookies—Zirochki—are exactly the kind of thing I turn to when I want something homemade that looks thoughtful but doesn’t demand an afternoon in the kitchen. They’re crisp at the edges, tender in the middle, and the jam center gives a bright pop of flavor. The recipe uses pantry staples and a small jar of preserves, so it’s perfect for using up that jar of jam you bought for pancakes.
I like them because they’re straightforward to make and forgiving in small ways: the dough rests briefly, the cutouts are baked quickly, and assembly is simple. You don’t need complicated equipment—just a rolling pin, cookie cutter, parchment, and a little patience while you watch them brown. They’re great with tea, for lunchbox treats, or bundled up as a small gift.
Below I’ll walk you through everything from what to buy, to the exact steps, common mistakes and fixes, smart swaps, and how to store them so they stay fresh. I keep the directions unchanged from the original method so you can follow them exactly and get the same results I do.
Shopping List
Before you start, check that you have the basics: flour, butter, eggs, sugar, baking soda, white vinegar, honey, a jar of jam, and powdered sugar for finishing. I recommend buying a jam you really enjoy tasting straight from the jar—its flavor is the star of the sandwich. Also make sure your butter and eggs can come to room temperature before you begin; that small detail makes a difference in how the dough comes together.
Tools and pantry staples: parchment paper, a small round cutter or a clean straw for the centers, a rolling pin, cookie cutters in your preferred shape, and a bowl for the powdered sugar dip. If you plan to bake multiple sheets, having a second baking sheet helps keep things moving.
Ingredients
- 3cups+ 2 Tbsp all-purpose flour — the structure for the cookies; have a little extra for dusting the surface so the dough doesn’t stick.
- 2sticks,16 Tbsp Unsalted butter, softened to room temp — provides flavor and tenderness; room temperature makes it easier to rub into the flour.
- 2large eggs,room temp — help bind the dough and add richness; room temperature beats up more evenly with the sugar.
- 1cupgranulated sugar — sweetens and helps create a slightly crisp edge when baked.
- 1tspbaking soda — a small lift; it reacts with the vinegar for gentle leavening.
- 2tspwhite vinegar — combines with the baking soda to produce lift; add immediately so it reacts while mixing.
- 2Tbspliquid honey — adds a touch of flavor and helps the dough bind; liquid honey mixes in easily.
- 9ozjar of your favorite jam or thick preserves,I used lingonberry preserves — the filling; choose a thick preserve so it won’t run when sandwiched.
- 1/2cuppowdered sugar — for coating the finished sandwiches; it adds a soft sweetness and attractive finish.
Jam Filled Sandwich Cookies (Zirochki) Cooking Guide
- Combine 3 cups + 2 Tbsp all-purpose flour and 2 sticks (16 Tbsp) softened unsalted butter in a large mixing bowl. Use your hands to rub the butter into the flour until the mixture has a sandy texture with fine crumbles.
- In a separate mixing bowl, add 2 large room-temperature eggs and 1 cup granulated sugar. Beat on high speed for about 5 minutes, until the mixture is pale yellow and smooth.
- Pour the beaten egg-and-sugar mixture over the flour-and-butter mixture. Gently fold with a spatula just until incorporated.
- In a small bowl or ramekin, combine 1 tsp baking soda and 2 tsp white vinegar; it will fizz. Immediately add this soda-vinegar mixture to the dough along with 2 Tbsp liquid honey. Mix with a spatula until the dough comes together into one cohesive mass.
- Cover the dough with plastic wrap and let it rest at room temperature for 30 minutes.
- While the dough rests (or after it finishes resting), line one or two large baking sheets with parchment paper. Preheat the oven to 350°F (175°C) before you begin baking.
- After the 30-minute rest, divide the dough into 4 equal pieces. Keep the pieces you are not working with covered so they do not dry out.
- On a lightly floured nonstick surface, roll one piece of dough at a time to about 1/8-inch thickness. Add more flour to the surface and dough as needed to prevent sticking.
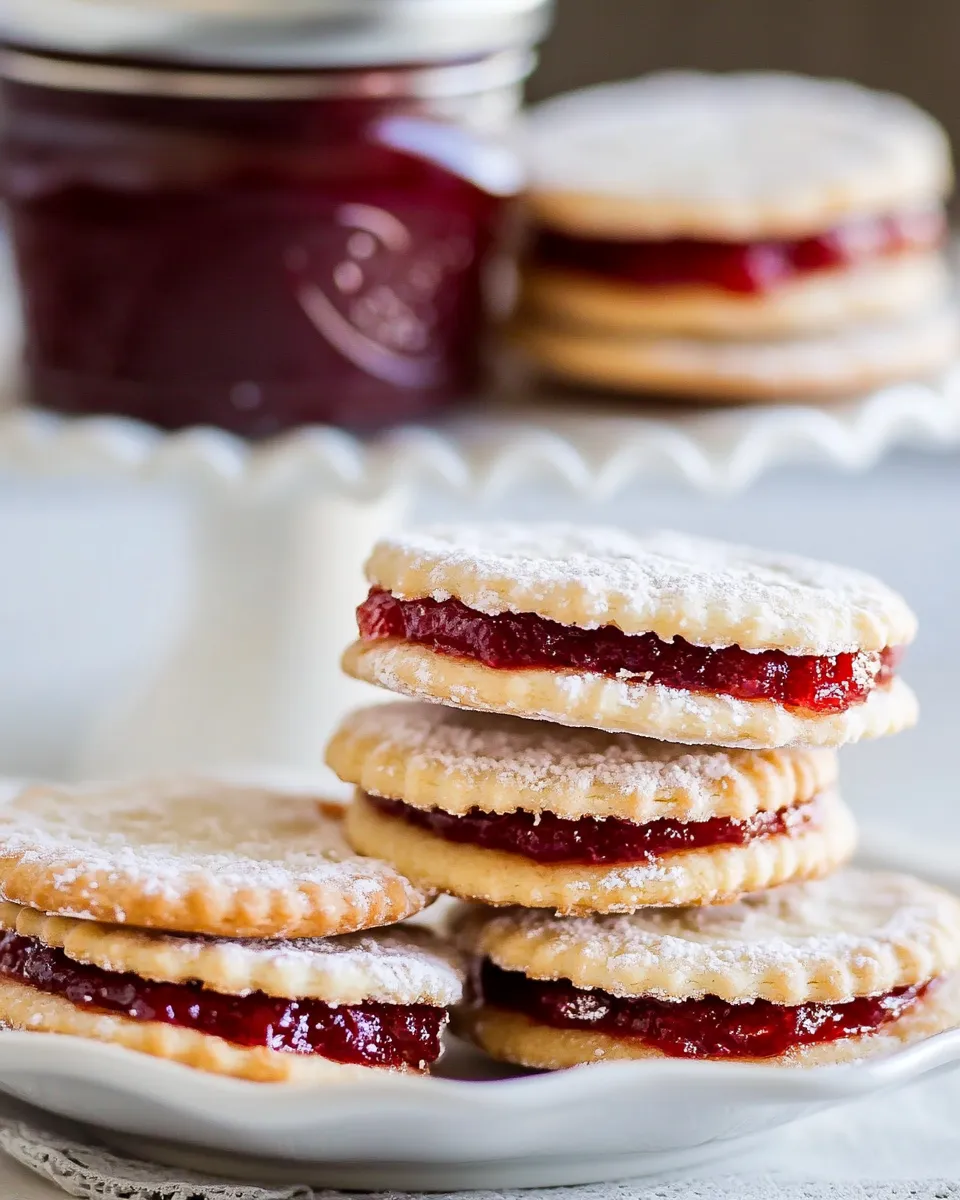
- Use a cookie cutter to cut out shapes. For half of the cutouts, make a center hole about 1/3 inch in diameter (a small round cutter or a straw works). Transfer the cut cookies to the prepared parchment-lined baking sheet, spacing them about 1 inch apart. Recombine scraps, cover, and roll again until all dough is used.
- Bake the cookies at 350°F for 5–8 minutes, or until they are just lightly golden on top. Watch closely, as they can brown quickly. You may need to bake in two or more batches depending on your oven and sheet size.
- Remove cookies from the oven and let them cool completely on the baking sheet or a wire rack before assembling.
- To assemble, spread a small spoonful of the 9 oz jar of jam or thick preserves onto the flat (solid) cookie base. Top with a cookie that has a center hole, pressing the edges together gently to form a sandwich.
- Place 1/2 cup powdered sugar in a shallow bowl or plate. Lightly dip or press both the top and bottom of each assembled cookie sandwich into the powdered sugar to coat. Serve.
Why Jam Filled Sandwich Cookies (Zirochki) is Worth Your Time
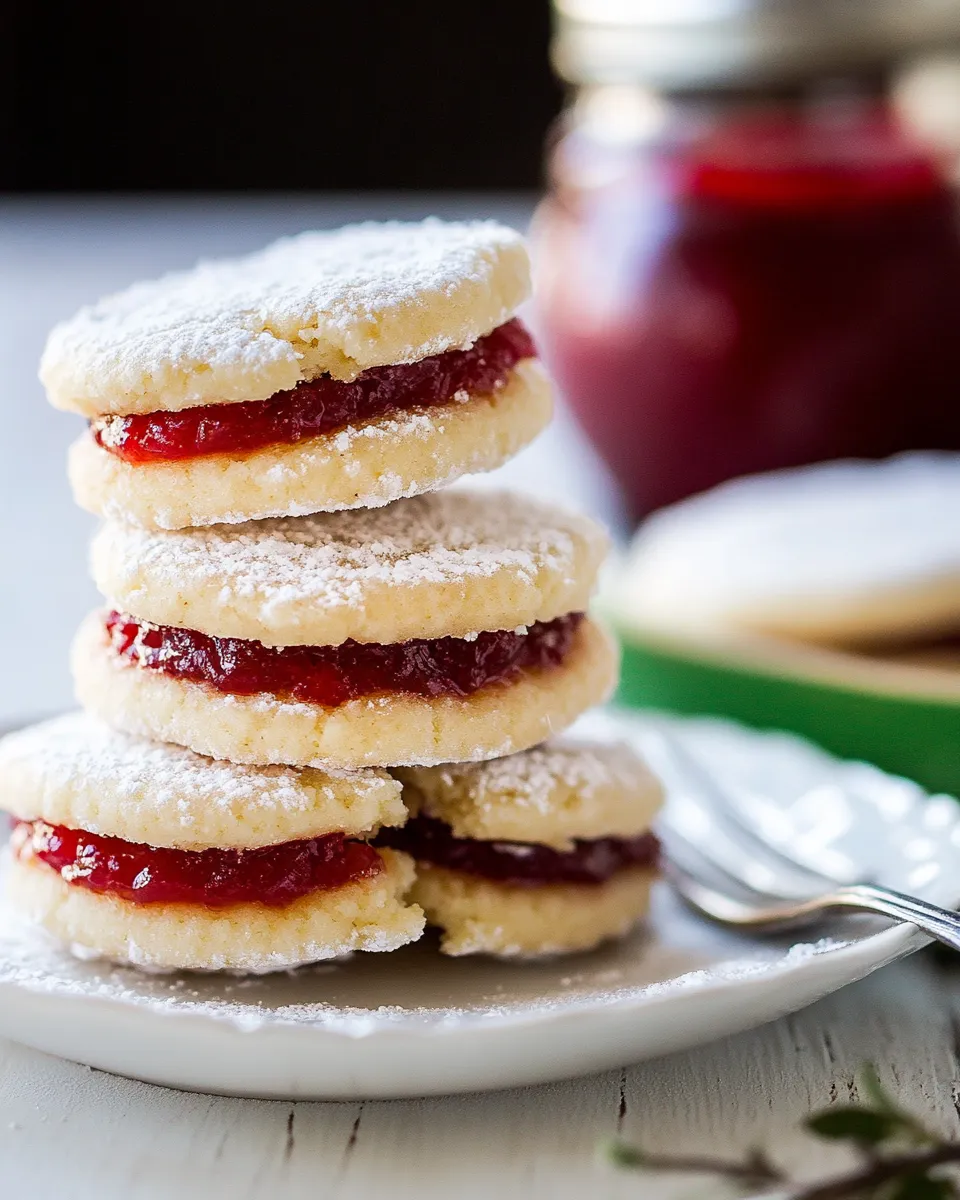
These cookies deliver on three fronts: flavor, appearance, and efficiency. The simple dough gives a clean, buttery backdrop that lets the jam shine. The small center window in the top cookie makes for an attractive bite-sized presentation without you having to frost or pipe anything fancy.
Time-wise, the active work is mostly rubbing butter into flour, beating the eggs and sugar, and rolling and cutting. The baking is quick, so you see progress fast. They’re also a forgiving recipe — brief resting, short bakes, and easy assembly mean fewer opportunities for things to go wrong compared to more delicate pastries.
Substitutions by Category
When you need to swap an ingredient, keep the role each item plays in mind: structure, fat, lift, sweetening, or filling. Below are practical category-based swaps that preserve the balance of the dough.
- Fat — the recipe calls for unsalted butter. If you only have salted butter, reduce any added salt elsewhere (this recipe doesn’t add salt separately, so just be aware the cookies may be slightly saltier).
- Sweetener — the recipe uses granulated sugar and a touch of honey. You can choose a different flavor of honey or a light floral honey if you want a subtle taste change; keep the same amount of liquid honey.
- Filling — use any thick jam or preserves you enjoy. Thicker preserves (rather than runny fruit jam) will hold up better during assembly.
- Leavening — the baking soda + vinegar combo is small and precise. It’s there to give a gentle lift; substitute only with caution and keep measurements exact if you change.
Prep & Cook Tools
- Large mixing bowl for flour and butter.
- Separate mixing bowl and electric mixer or whisk for eggs and sugar.
- Spatula for folding.
- Small bowl or ramekin for baking soda + vinegar.
- Plastic wrap for resting the dough.
- Baking sheets and parchment paper.
- Rolling pin and a light dusting surface (flour).
- Cookie cutters and a small round cutter or straw for center holes.
- Wire rack for cooling.
- Shallow bowl or plate for powdered sugar coating.
Missteps & Fixes
Dough too sticky or too dry
If the dough sticks while rolling, use a touch more flour on the work surface and on your rolling pin. If the dough feels crumbly and won’t come together, press the scraps together and add a tiny splash of liquid honey or a teaspoon of room-temperature water and knead gently until cohesive.
Cookies brown too fast
Ovens vary. If the edges brown before the centers are set, lower your oven temperature by 10–20°F and bake a touch longer, watching closely. Use the middle rack and rotate pans if you’re baking multiple sheets.
Jam leaks out during assembly
Use thick preserves rather than runny jam and don’t overfill. A small spoonful is enough; press the top and bottom gently together and let them sit a minute before dredging in powdered sugar so the jam sets slightly.
Powdered sugar clumps
Sift the powdered sugar if it’s clumpy before putting it in a shallow bowl for coating. Lightly press the cookie into the sugar rather than dipping aggressively to avoid over-coating.
Smart Substitutions
Keep swaps minimal and purposeful. If using salted butter, expect a slightly different flavor; if you prefer a different preserve, choose a thick one so assembly stays neat. If you want finer texture, use superfine (caster) sugar, which dissolves faster when beaten with the eggs, yielding a smoother batter.
Also, you can switch cutter shapes to make seasonal treats—keep the top cutout relatively small (about 1/3 inch) so the jam is visible but restrained.
Method to the Madness
There are a few practical reasons the recipe is assembled the way it is. Rubbing the butter into the flour creates those sandy crumbs that produce a tender, slightly shortbread-like texture. Whipping the eggs and sugar aerates the mixture, giving a light lift without relying on a lot of chemical leaveners. The baking soda + vinegar is a quick reaction to add a little lift and help the cookies set with a delicate crumb.
Resting the dough for 30 minutes relaxes the gluten and makes rolling easier, while the quick 5–8 minute bake time preserves a light color and crisp edge. Finally, cooling completely before assembly prevents jam from melting and keeps the sandwich neat.
Save for Later: Storage Tips
Unassembled cookies: store completely cooled cookies in an airtight container at room temperature for up to 3 days. Layer with parchment or wax paper so they don’t stick.
Assembled cookies: best eaten within 24–48 hours after assembly. The jam can make the cookies slightly softer over time; store in a single layer in an airtight container at room temperature for up to 2 days.
Freezing: you can freeze unbaked dough pieces wrapped tightly in plastic, or baked cookies (unassembled) in an airtight container with parchment between layers for up to 2 months. Thaw at room temperature before assembling and dusting with powdered sugar.
Jam Filled Sandwich Cookies (Zirochki) FAQs
- Can I use any jam? Yes. Choose a thick preserve so it doesn’t run when you assemble the sandwiches.
- Can I make the dough ahead? Yes. Wrapped tightly, the dough can chill in the fridge for up to 24 hours; let it come back to room temperature before rolling so it’s easy to work with.
- Why the baking soda and vinegar? They react to produce a small amount of lift, giving the cookie a tender structure without making it cakey.
- What if my cookies are too crisp or too soft? Thickness and bake time control texture. Roll to about 1/8-inch thickness and bake 5–8 minutes; thinner and shorter yields crisper cookies.
- How do I keep the jam from making the cookies soggy? Use a thick preserve, allow cookies to cool fully before assembling, and don’t overfill.
Bring It to the Table
Serve these Jam Filled Sandwich Cookies with tea, coffee, or a small glass of milk. They make a pretty addition to a dessert plate because the jam peek-through is instantly appealing—no frosting needed. For gifting, stack them in a shallow box with parchment between layers and tie with twine for a homey finish.
They’re quick to scale if you need more: divide the dough into equal pieces, keep extras covered, and bake in batches. The recipe’s simplicity is its strength: a few minutes of hands-on work, a short bake, and you have elegant little cookies that taste like care and childhood at the same time.
Jam Filled Sandwich Cookies (Zirochki)
Ingredients
Ingredients
- 3 cups+ 2 Tbsp all-purpose flour
- 2 sticks 16 Tbsp Unsalted butter, softened to room temp
- 2 large eggs room temp
- 1 cupgranulated sugar
- 1 tspbaking soda
- 2 tspwhite vinegar
- 2 Tbspliquid honey
- 9 ozjar of your favorite jam or thick preserves I used lingonberry preserves
- 1/2 cuppowdered sugar
Instructions
Instructions
- Combine 3 cups + 2 Tbsp all-purpose flour and 2 sticks (16 Tbsp) softened unsalted butter in a large mixing bowl. Use your hands to rub the butter into the flour until the mixture has a sandy texture with fine crumbles.
- In a separate mixing bowl, add 2 large room-temperature eggs and 1 cup granulated sugar. Beat on high speed for about 5 minutes, until the mixture is pale yellow and smooth.
- Pour the beaten egg-and-sugar mixture over the flour-and-butter mixture. Gently fold with a spatula just until incorporated.
- In a small bowl or ramekin, combine 1 tsp baking soda and 2 tsp white vinegar; it will fizz. Immediately add this soda-vinegar mixture to the dough along with 2 Tbsp liquid honey. Mix with a spatula until the dough comes together into one cohesive mass.
- Cover the dough with plastic wrap and let it rest at room temperature for 30 minutes.
- While the dough rests (or after it finishes resting), line one or two large baking sheets with parchment paper. Preheat the oven to 350°F (175°C) before you begin baking.
- After the 30-minute rest, divide the dough into 4 equal pieces. Keep the pieces you are not working with covered so they do not dry out.
- On a lightly floured nonstick surface, roll one piece of dough at a time to about 1/8-inch thickness. Add more flour to the surface and dough as needed to prevent sticking.
- Use a cookie cutter to cut out shapes. For half of the cutouts, make a center hole about 1/3 inch in diameter (a small round cutter or a straw works). Transfer the cut cookies to the prepared parchment-lined baking sheet, spacing them about 1 inch apart. Recombine scraps, cover, and roll again until all dough is used.
- Bake the cookies at 350°F for 5–8 minutes, or until they are just lightly golden on top. Watch closely, as they can brown quickly. You may need to bake in two or more batches depending on your oven and sheet size.
- Remove cookies from the oven and let them cool completely on the baking sheet or a wire rack before assembling.
- To assemble, spread a small spoonful of the 9 oz jar of jam or thick preserves onto the flat (solid) cookie base. Top with a cookie that has a center hole, pressing the edges together gently to form a sandwich.
- Place 1/2 cup powdered sugar in a shallow bowl or plate. Lightly dip or press both the top and bottom of each assembled cookie sandwich into the powdered sugar to coat. Serve.
Equipment
- Large Mixing Bowl
- small bowl or ramekin
- Rolling Pin
- Cookie cutter
- Baking Sheet
- Parchment Paper
- Wire Rack
Notes
These cookies can be eaten right away but are even better a few hours later or even the next day after they've had a chance to soften from the jam.


