
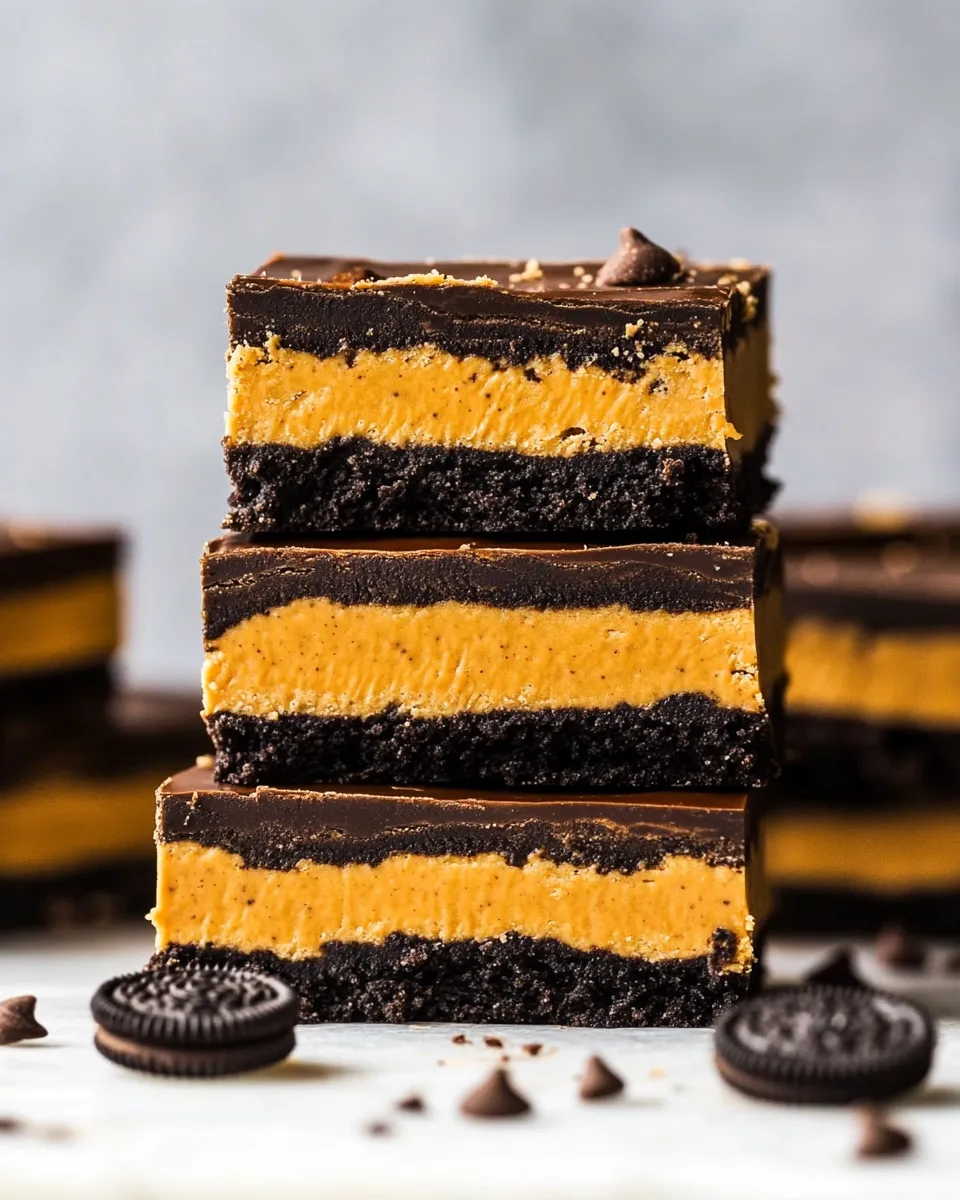
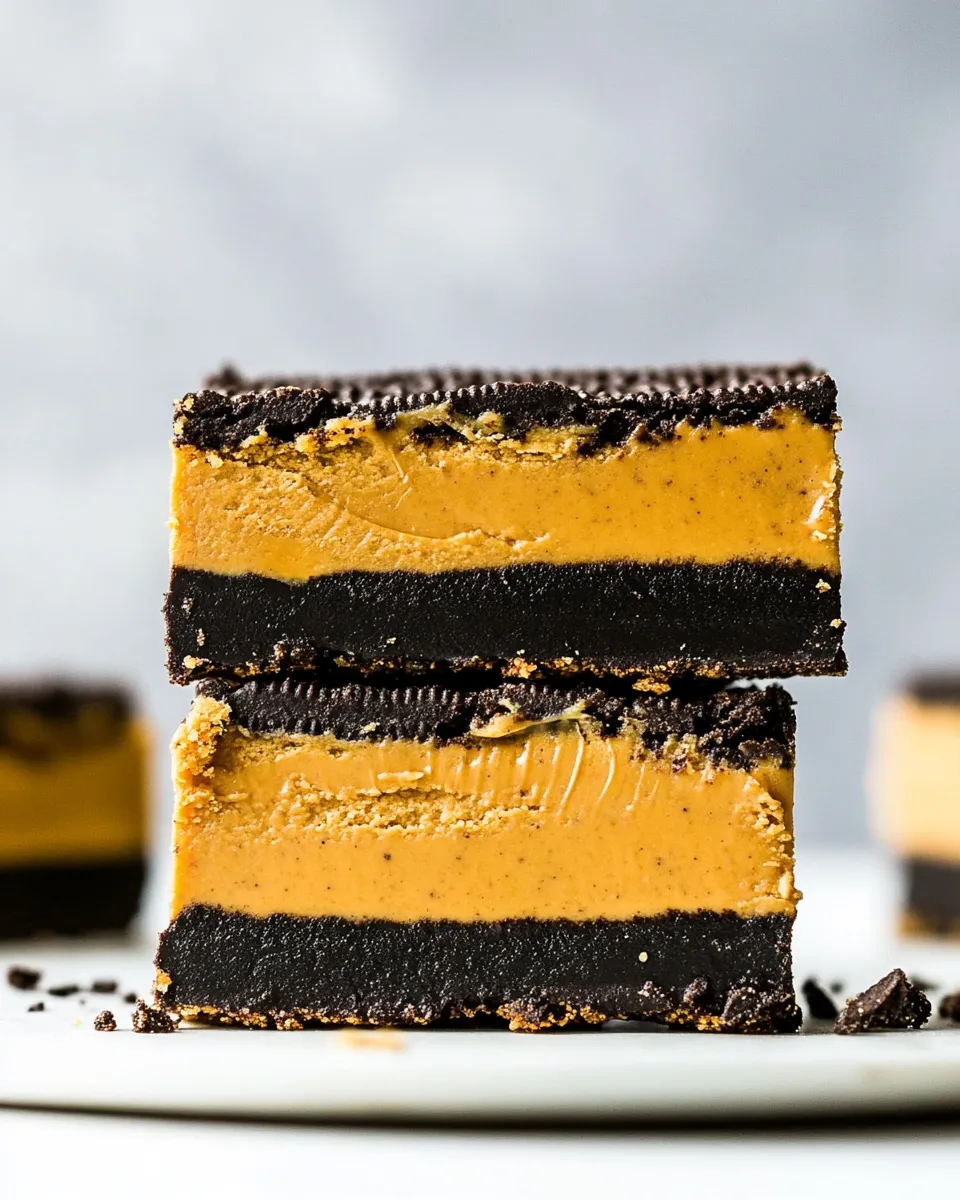
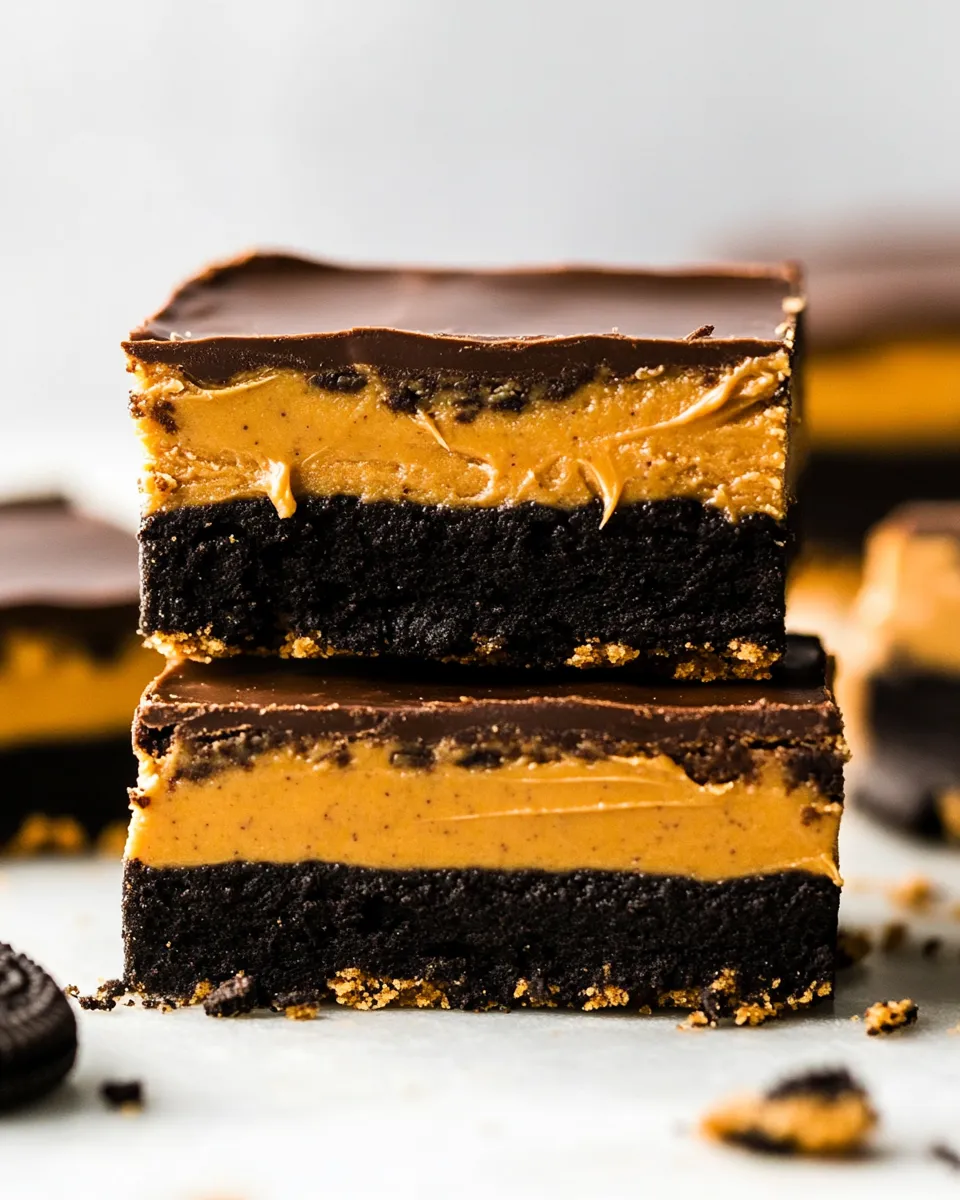
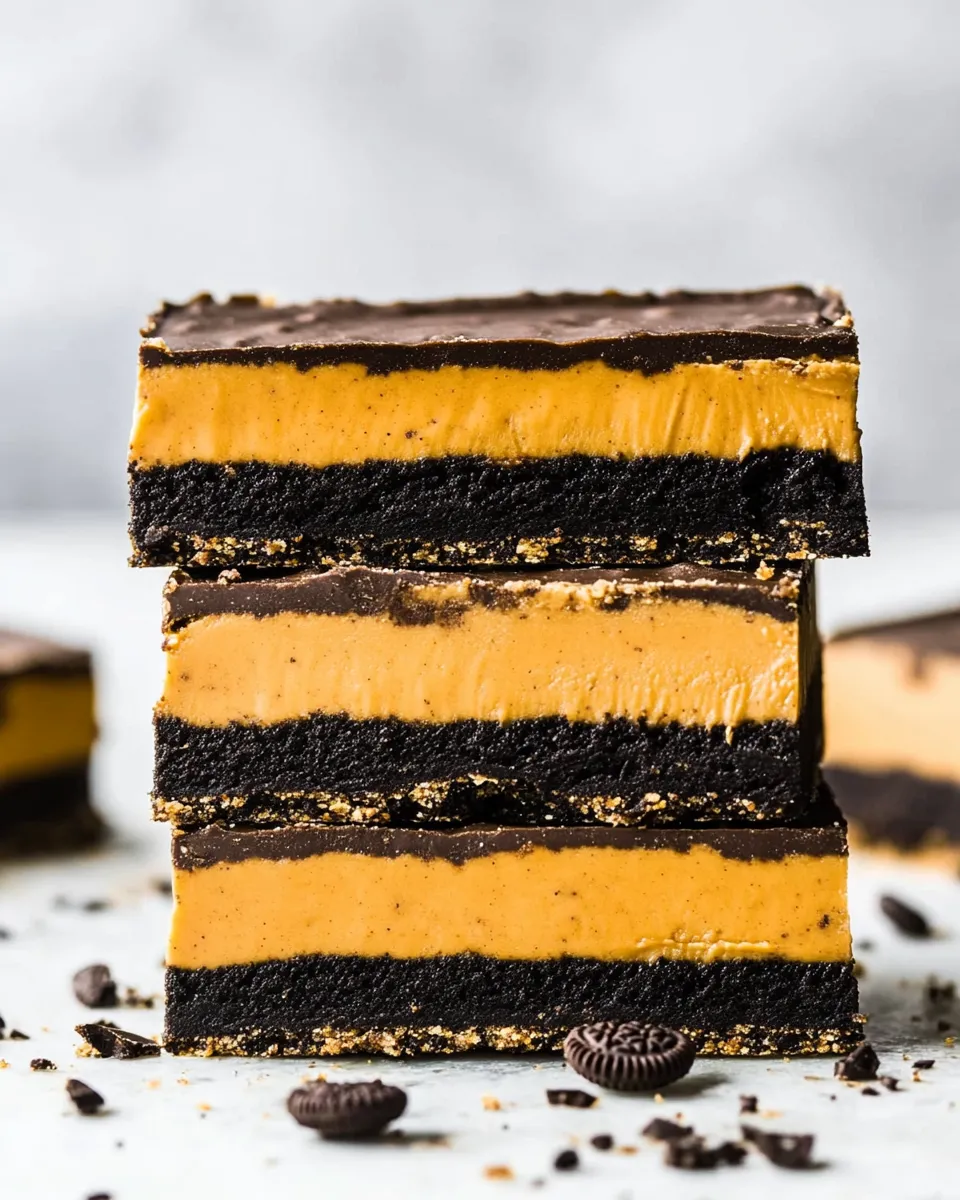
These bars are exactly what they sound like: an Oreo crust, a peanut butter center, and a glossy chocolate–peanut butter topping. They’re straightforward to make, forgiving in technique, and deliver the kinds of contrasting textures I always look for—crumbly crust, dense filling, and a smooth top. No fancy equipment, just a food processor and a little patience while the layers set.
I make these when I need a dessert that travels well and keeps for days in the fridge. They slice cleanly when chilled and hold up on a dessert table. The recipe is built around pantry staples and a dependable order of steps, so follow the sequence and you’ll get consistent results.
Below you’ll find a clear ingredient breakdown, the exact step-by-step directions, troubleshooting notes, tool suggestions, and a few sensible variations by season. Read through once, line up your ingredients, and the process becomes fast and satisfying.
Ingredient Breakdown
- 30 Oreos, not double stuffed — The base/crust once ground. The recipe relies on the standard Oreos for texture and sweetness; double-stuffed will alter moisture and sweetness balance.
- 6 tablespoons salted butter, room temperature — Binds the ground Oreos into a pressable crust. Room temp butter makes it easier to incorporate by pulsing in a food processor.
- 1 cups salted butter, melted — Used in the peanut butter filling; provides richness and helps the filling set. Keep it melted but not hot.
- 2 cups graham cracker crumbs — Adds body and structure to the peanut butter layer. Fine crumbs mix smoothly with the melted butter and powdered sugar.
- 2 cups powdered sugar — Sweetens and firms the peanut butter filling; sift if it’s clumpy for a smoother texture.
- 1 ¼ cups creamy peanut butter, divided — Central flavor. The recipe divides it so part becomes the filling and a portion melts with chocolate for the topping.
- 1 ½ cups semi-sweet or milk chocolate chips — Melts with the 1/4 cup peanut butter to make a glossy top. Choose semi-sweet for balance or milk for a sweeter finish.
Step-by-Step: Oreo Peanut Butter Bars
- Line a 9×13-inch pan with parchment paper, leaving a 1-inch overhang on two opposite sides; set aside.
- Put 30 Oreos (not double stuffed) into a food processor and pulse until finely ground. Add 6 tablespoons salted butter (room temperature) and pulse until the butter is fully incorporated and the mixture resembles wet sand.
- Press the Oreo mixture into an even layer in the prepared pan using your fingers or the bottom of a flat measuring cup. Freeze for 20 minutes while you make the filling.
- In a large bowl, combine 1 cup salted butter (melted), 2 cups graham cracker crumbs, 2 cups powdered sugar, and 1 cup of the 1 1/4 cups creamy peanut butter. Stir until smooth and evenly combined.
- Spread this peanut butter filling evenly over the chilled Oreo crust.
- In a microwave-safe bowl or over a double boiler, melt the remaining 1/4 cup creamy peanut butter together with 1 1/2 cups semi-sweet or milk chocolate chips, stirring frequently. If using the microwave, heat in 30-second intervals and stir between intervals until smooth.
- Spread the melted chocolate–peanut butter mixture evenly over the peanut butter layer.
- Refrigerate the bars for at least 1 hour, until set. Use the parchment overhang to lift the whole slab from the pan and cut into bars. Store leftovers in the refrigerator.
What Sets This Recipe Apart
First, the crust is Oreo-based rather than graham-only, which gives a deep chocolate note that plays nicely with peanut butter. Second, the filling balances butter, powdered sugar, and graham crumbs so it’s dense without being dry. The melted peanut butter folded into the chocolate for the top adds an extra hit of nutty flavor that ties the whole bar together.
Everything here is layered and chilled, not baked. That makes the texture more like a candy bar or a no-bake slice—fudgy, slightly firm, and easy to portion. Because the recipe uses a small amount of melted butter in the filling and chilled crust, the bars hold a clean edge when sliced if properly chilled.
If You’re Out Of…
If you don’t have a food processor, you can place the Oreos in a heavy-duty zip-top bag and crush them with a rolling pin until they’re fine. It will take a few more minutes and some muscle, but you’ll get the same wet-sand consistency once you work the 6 tablespoons of butter in.
If your chocolate chips are all you have and they’re not melting smoothly, chop them slightly to help them melt more evenly. The recipe specifies semi-sweet or milk chocolate chips; either will work. Don’t substitute vastly different ingredients unless you’re prepared for a texture or flavor change.
Toolbox for This Recipe
- 9×13-inch baking pan — Necessary size for the recipe to set in the expected thickness.
- Parchment paper — For easy removal; leave a 1-inch overhang as directed.
- Food processor (preferred) or rolling pin and zip-top bag — To grind the Oreos fine.
- Measuring cups and spoons — Keep portions accurate; the filling relies on those ratios.
- Large mixing bowl and spatula — For combining the filling ingredients evenly.
- Microwave-safe bowl or double boiler — For melting chocolate and the final peanut butter portion; stirring frequently prevents scorching.
- Sharp knife and cutting board — Chill completely before slicing so you get clean bars.
Pitfalls & How to Prevent Them
Unstable crust: If the Oreo mixture isn’t pressed firmly, the crust can crumble when cutting. Press evenly across the entire 9×13 surface, using the flat bottom of a measuring cup to compact it. A 20-minute freeze is given in the recipe—don’t skip it.
Soggy filling: Overheating the melted butter used in the filling can make the mixture looser than intended. Use melted but not hot butter and stir the mixture until smooth. If it seems too soft, chill the pan briefly before spreading the filling to help it firm up.
Grainy chocolate top: Chocolate can seize if it gets water or is overheated. Use dry bowls and utensils and heat in short microwave bursts (30 seconds), stirring between intervals. If using a double boiler, keep the water at a bare simmer and avoid steam touching the bowl.
Messy slices: Cutting too soon or using a dull knife will tear layers. Chill at least an hour as instructed, then lift the slab with the parchment overhang and use a hot, clean knife to make each cut—wipe the knife between slices.
Variations by Season
Summer: Serve chilled straight from the fridge for a cool, satisfying treat. The recipe’s chilled nature makes it ideal for warm weather when you want a no-bake dessert that holds its shape.
Holiday season: Use semi-sweet chocolate for a richer, less sweet top that balances holiday cookies and spiced desserts. The bars pair well with spiced coffee or hot cocoa during colder months.
Everyday indulgence: For an everyday version, follow the recipe exactly and slice small squares. That keeps portions reasonable while still delivering the full trio of Oreo, peanut butter, and chocolate in each bite.
Behind the Recipe
I first made this style of layered bar when I wanted something that felt like a candy bar but used pantry staples. The Oreo crust is a shortcut that brings real chocolate-cookie flavor without extra steps. The structure—crust, dense peanut butter layer, and a glossy chocolate top—came from wanting a firm bar that still yielded to each bite.
Over time I found the precise order matters: chill the crust before adding the filling, and melt the chocolate and remaining peanut butter together instead of swirled raw on top. Those small sequencing choices keep the layers neat and make the bars easy to slice and serve.
Storing, Freezing & Reheating
Store leftovers in an airtight container in the refrigerator, as the recipe instructs. Chilled bars keep their shape and texture best when cold and will last about 5–7 days refrigerated.
Freezing: These bars freeze well. Cut into squares, arrange in a single layer on a baking sheet to flash freeze for an hour, then transfer to a freezer-safe bag or container with parchment between layers. Thaw overnight in the refrigerator before serving. Freezer storage is good for up to 2 months.
Reheating: These are meant to be eaten chilled or at cool room temperature. If you prefer a slightly softer bite, leave them at room temperature for 10–15 minutes before serving. Do not microwave individual bars unless you want the chocolate to soften—microwaving will quickly melt the top and change the texture.
Frequently Asked Questions
- Can I use double-stuffed Oreos? — The recipe specifies not double stuffed. Using double-stuffed Oreos will add extra cream and moisture to the crust, which can make it softer and potentially affect setting. It will still be tasty, but texture will differ.
- Do I have to chill the bars for a full hour? — Chill at least 1 hour as the recipe directs; this ensures the chocolate top firms and the filling sets so you can slice cleanly.
- Can I make these ahead? — Yes. You can assemble and refrigerate them for several days or freeze cut bars as outlined above.
- What if my chocolate seizes? — Keep water away from the chocolate and melt slowly. If it does seize, sometimes a small splash of neutral oil or a touch more warmed peanut butter can help smooth it, but prevention is best: dry tools and low heat.
The Takeaway
Oreo Peanut Butter Bars are a practical, crowd-pleasing dessert that stays consistent when you follow the steps. Grind the Oreos fine, press the crust firmly, chill as directed, and melt the chocolate gently. Those are the simple rules that yield tidy bars with three satisfying layers.
Make them for a potluck, bring them to a picnic, or keep a pan in your fridge for quick coffee-time indulgence. They store and freeze well, require only common equipment, and reward precise, calm assembly with slices that look as good as they taste.

Oreo Peanut Butter Bars
Ingredients
Ingredients
- 30 Oreos not double stuffed
- 6 tablespoonssalted butter room temperature
- 1 cupsalted butter melted
- 2 cupsgraham cracker crumbs
- 2 cupspowdered sugar
- 1 1/4 cupscreamy peanut butter divided
- 1 1/2 cupssemi-sweet or milk chocolate chips
Instructions
Instructions
- Line a 9×13-inch pan with parchment paper, leaving a 1-inch overhang on two opposite sides; set aside.
- Put 30 Oreos (not double stuffed) into a food processor and pulse until finely ground. Add 6 tablespoons salted butter (room temperature) and pulse until the butter is fully incorporated and the mixture resembles wet sand.
- Press the Oreo mixture into an even layer in the prepared pan using your fingers or the bottom of a flat measuring cup. Freeze for 20 minutes while you make the filling.
- In a large bowl, combine 1 cup salted butter (melted), 2 cups graham cracker crumbs, 2 cups powdered sugar, and 1 cup of the 1 1/4 cups creamy peanut butter. Stir until smooth and evenly combined.
- Spread this peanut butter filling evenly over the chilled Oreo crust.
- In a microwave-safe bowl or over a double boiler, melt the remaining 1/4 cup creamy peanut butter together with 1 1/2 cups semi-sweet or milk chocolate chips, stirring frequently. If using the microwave, heat in 30-second intervals and stir between intervals until smooth.
- Spread the melted chocolate–peanut butter mixture evenly over the peanut butter layer.
- Refrigerate the bars for at least 1 hour, until set. Use the parchment overhang to lift the whole slab from the pan and cut into bars. Store leftovers in the refrigerator.
Equipment
- 9x13-inch pan
- Parchment Paper
- Food Processor
- Measuring cups and spoons
- Microwave-Safe Bowl or Double Boiler
- Spatula
Notes
8. Refrigerate the bars for at least 1 hour, until set. Use the parchment overhang to lift the whole slab from the pan and cut into bars. Store leftovers in the refrigerator.


