
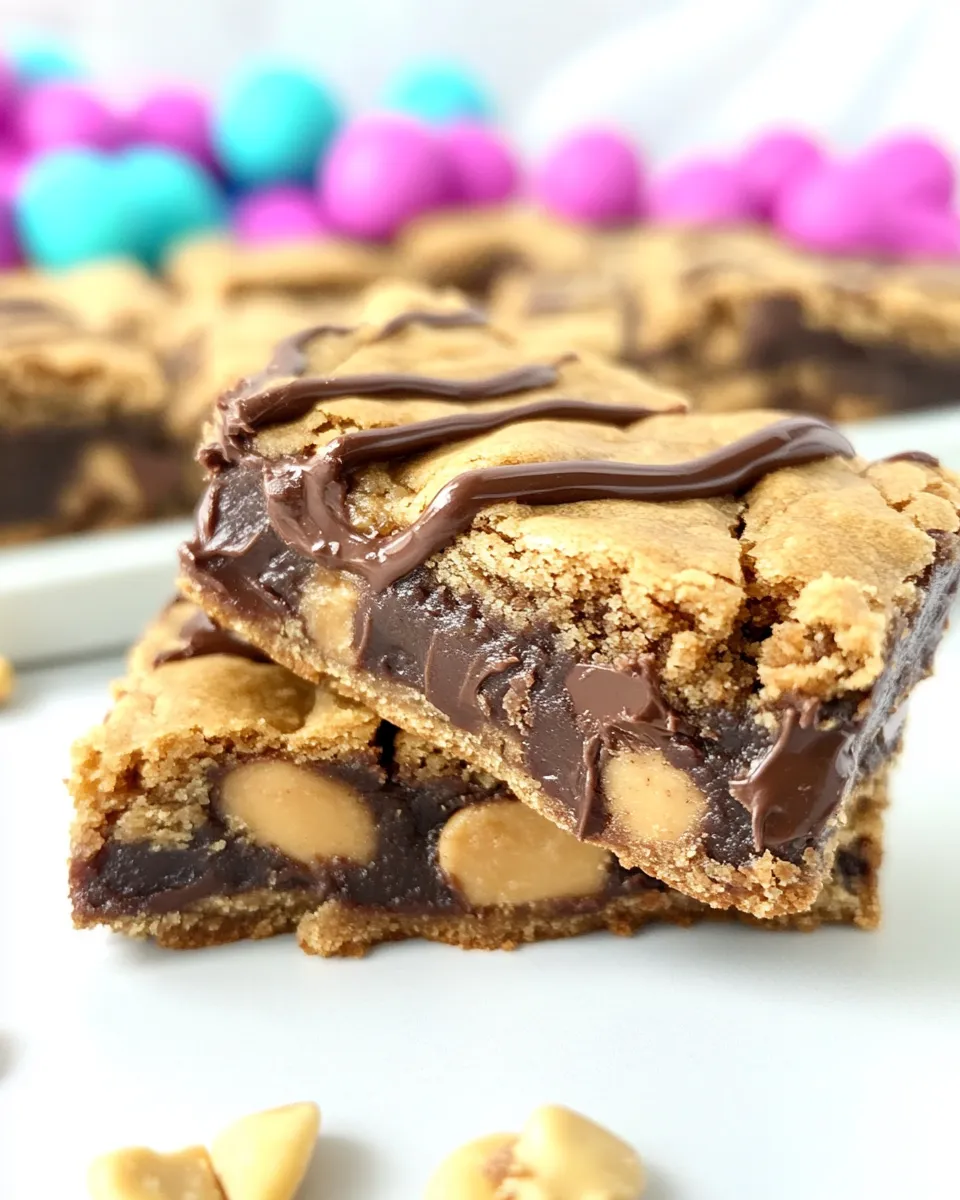
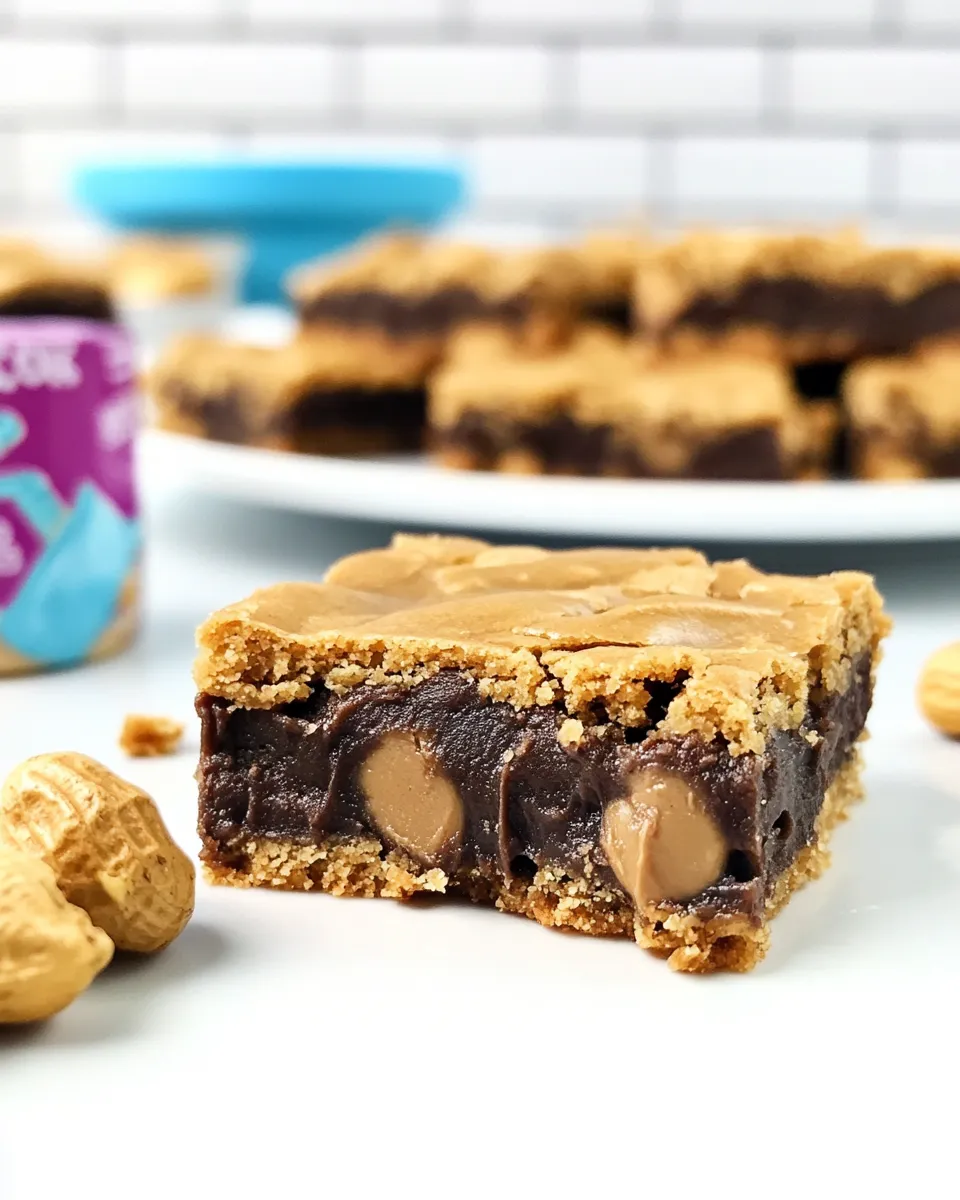
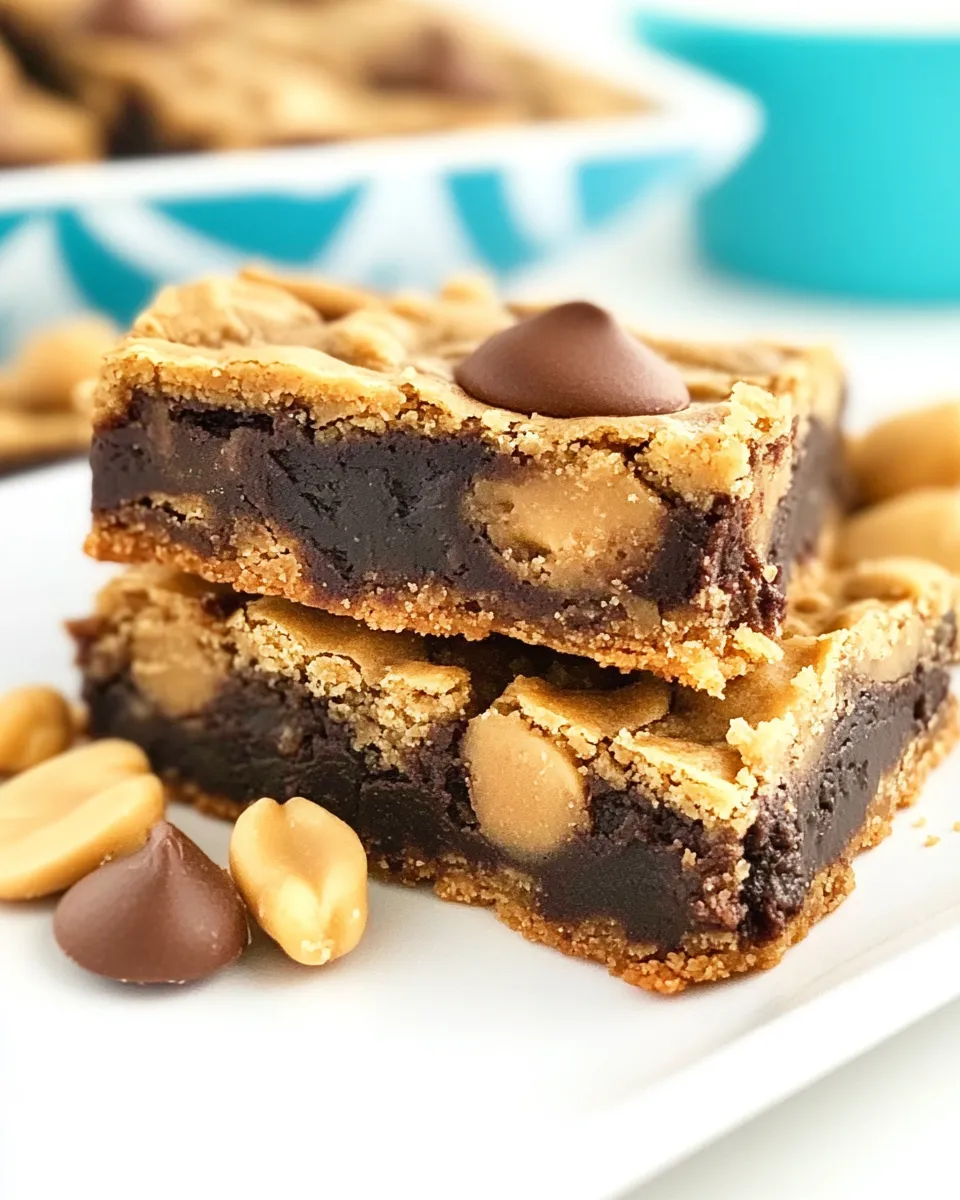
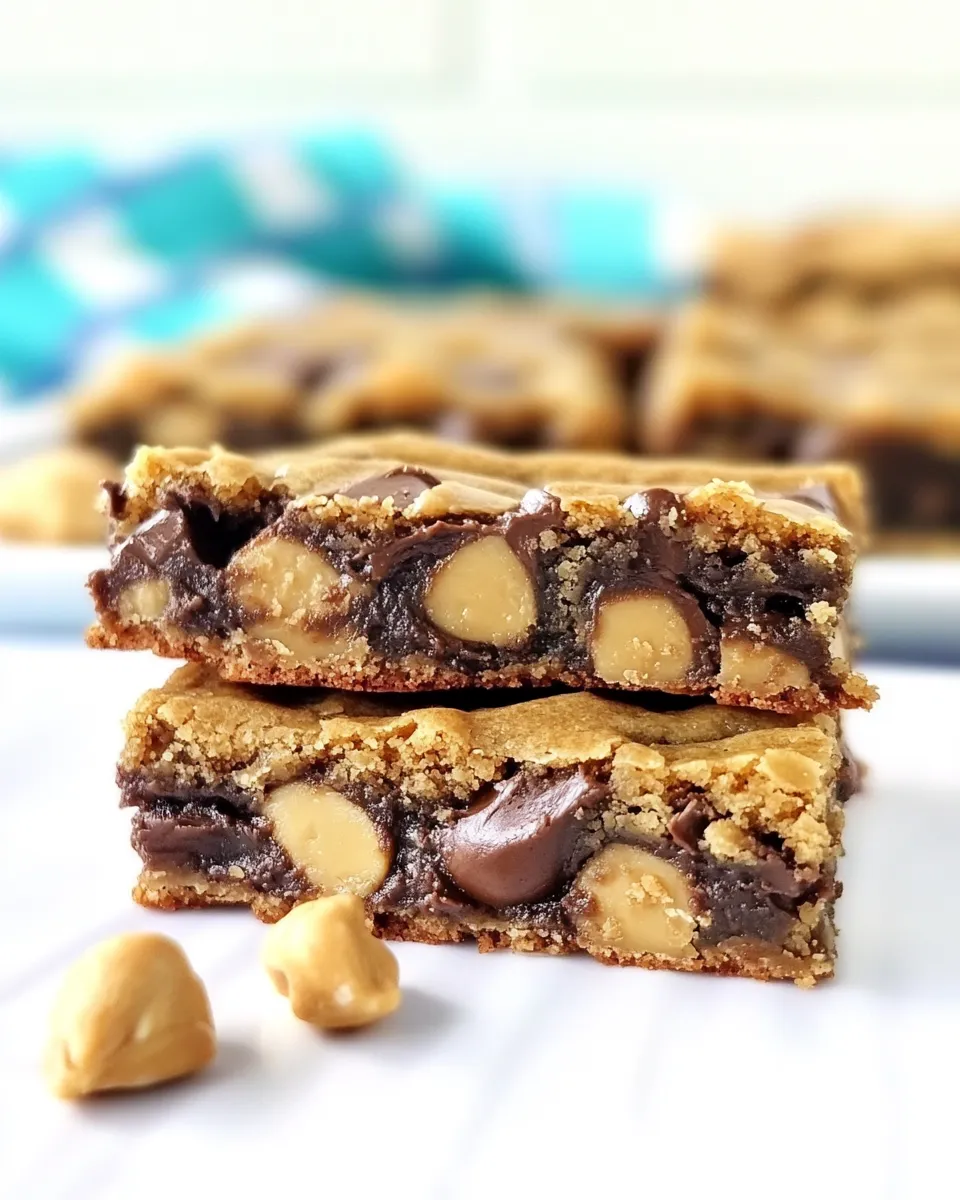
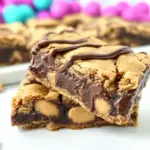
I bake for a living and for my neighbors, and these bars are the kind of thing I make when I need a guaranteed crowd-pleaser. They’re dense, chewy, and exactly as indulgent as the name promises: three peanut-butter-forward mix-ins—peanut butter chips, chocolate chips, and chopped Butterfinger pieces—packed into a cookie-bar base. No complicated techniques. No special equipment. Just confident folding and a hot oven.
What I love about this recipe is its predictability. The dough behaves like a classic cookie dough but presses into a pan for fast, even baking. You get well-browned edges and a set center with minimal fuss. If you want bars to bring to a potluck, tuck into a lunchbox, or cut into squares for coffee break guests, these deliver every time.
I’ll walk through the ingredients, the step-by-step bake, common mistakes, and a few smart swaps (including a keto idea if you need it). Read through the tips and you’ll save time and avoid the usual pitfalls: overmixing, underbaking, and uneven mix-in distribution. Let’s get to it.
Ingredients
- ½cup(113g) unsalted butter, softened — provides richness and the base fat for tender bars; bring to room temperature for even mixing.
- ¾cup(200g) peanut butter(creamy or crunchy, use a no-stir brand) — flavor star and binding agent; a no-stir jar keeps texture consistent.
- 1cup(200g) packed brown sugar — adds moisture and chew; packed brown sugar gives that caramel note.
- 1large egg — adds structure and helps the dough hold together; use room-temperature egg if possible.
- 1teaspoonvanilla extract — rounds the peanut-butter flavor and lifts sweetness.
- 1tablespoonmilk — loosens the dough slightly for an easier press into the pan.
- ¼teaspoonsalt — balances sweetness and enhances the peanut flavor; don’t skip.
- 1teaspoonbaking soda — gives a touch of lift so the bars aren’t flat and dense.
- 1 ½cupsall purpose flour — the structure; measure properly (spoon and level) to avoid dry bars.
- 1cuppeanut butter chips — boosts the peanut profile and creates pockets of melty peanut goodness.
- 1cupchopped Butterfingers pieces — adds crunch and a candy-bar twist; chop into small, evenly sized pieces.
- 1cupchocolate chips — classic contrast to peanut butter; semisweet or milk both work.
What to Buy
Buy good peanut butter and a reliable Butterfinger bar (or prepackaged Butterfinger pieces if your store stocks them). A creamy, no-stir peanut butter gives an even texture in the dough; if you prefer some crunch, a crunchy jar works too but the chew will differ slightly.
Pick packed brown sugar (don’t substitute granulated without adjusting liquid) and fresh baking soda—old soda gives weak rise. For chips, choose brands you like eating by the handful. The cookie-bar nature of this recipe means quality of the mix-ins carries through to every bite.
Cook Triple Threat Peanut Butter Cookie Bars Like This
- Preheat the oven to 350°F. Line a 9×13″ pan with foil and spray the foil with nonstick cooking spray (leave some foil overhang to lift the bars out later).
- In a large bowl using a hand mixer or in the bowl of a stand mixer fitted with the paddle attachment, beat the softened unsalted butter and the peanut butter together until smooth.
- Add the packed brown sugar and beat until the mixture is creamy and combined.
- Add the egg, vanilla extract, milk, salt, and baking soda; mix until everything is incorporated.
- Gradually add the all-purpose flour and mix on low speed (or stir) until just combined and no large streaks of flour remain.
- Fold in the peanut butter chips, chocolate chips, and chopped Butterfinger pieces until evenly distributed through the dough.
- Transfer the dough to the prepared 9×13″ pan and press it into an even layer using a spatula or your hands. If you like, sprinkle additional peanut butter chips and Butterfinger pieces over the top.
- Bake in the preheated oven for 20–25 minutes, or until the edges are golden brown and the center is set (a toothpick inserted near the center should come out with a few moist crumbs, not wet batter).
- Remove the pan from the oven and cool completely in the pan on a wire rack. Use the foil overhang to lift the bars from the pan, then slice into bars.
- Store cooled bars in an airtight container for up to 3 days, or freeze for up to one month.
Why This Recipe Is Reliable
The formula follows classic cookie chemistry: butter and peanut butter for fat and flavor, brown sugar for moisture and chew, an egg for structure, and a small amount of baking soda for lift. The 9×13″ pan and press-and-bake method ensure even thickness and predictable bake time. You don’t have to portion dozens of cookies or guess at timing for single sheets—these bars bake uniformly.
Using a mix of chips and chopped candy gives textural contrast, but the dough itself is forgiving. It tolerates small variations in peanut butter type and chip brand. If you follow the mixing order—wet ingredients first, then flour—you avoid overdeveloping gluten. That’s why the method delivers consistent results across different kitchens.
Low-Carb/Keto Alternatives
If you need a low-carb take, this exact recipe won’t be keto because of the flour, sugar, and Butterfinger pieces. You can experiment by replacing all-purpose flour with a blend of almond flour and a small amount of coconut flour (start with 1 ¼ cups almond flour + 3–4 tablespoons coconut flour) and swap the packed brown sugar for a granular erythritol blend measured cup-for-cup. Use sugar-free chocolate chips and omit the Butterfinger pieces or use a low-carb candy substitute. Be prepared: texture and bake time will change; these substitutions tend toward a crumbly, denser bar, so reduce baking time and watch closely.
What You’ll Need (Gear)
Minimal gear makes this recipe accessible: a 9×13″ baking pan, aluminum foil, nonstick spray, a hand mixer or stand mixer with paddle attachment, mixing bowls, spatula, a wire cooling rack, and a sharp knife for cutting. If you prefer, press the dough with a piece of parchment to keep your hands clean, but I usually just use my hands or a spatula.
Frequent Missteps to Avoid
Overmixing the dough
Mix on low when you add the flour and stop as soon as flour streaks disappear. Overmixing develops gluten and makes bars tough.
Not softening the butter
Cold butter won’t cream properly with peanut butter, and you’ll get uneven texture. Leave it at room temperature until it gives slightly when pressed.
Undercooking or overcooking
Remove the bars when the center is set and a toothpick comes out with a few moist crumbs. Underbake and the center will be gummy; overbake and the bars dry out fast.
Make It Year-Round
These bars work any season. In winter, swap semisweet chips for dark chocolate for depth. In summer, bake early in the day so bars cool without heating your kitchen at peak hours. For holidays, press chopped salted peanuts or pretzel pieces on top for a salty-sweet finish. They freeze well, so bake a batch and defrost squares as needed—still excellent after a quick 20–30 minute thaw.
What Could Go Wrong
Soggy center: usually from underbaking or adding too much peanut butter (measure carefully). Dry, crumbly bars: the most common cause is too much flour from packing the measuring cup; use the spoon-and-level method. Candy pieces sinking or clumping: fold them in gently and press dough into an even layer so heavy pieces don’t gather at the bottom.
If your Butterfinger pieces lose crunch during mixing, chop them coarser and fold in last to preserve texture. Also avoid using overly soft or melted mix-ins; they’ll bleed into the dough and change texture.
Make Ahead Like a Pro
You can bake these a day in advance and store them in an airtight container at room temperature. For longer storage, freeze the cooled bars in a single layer on a sheet tray, then transfer to a freezer-safe bag or container for up to one month. Thaw at room temperature for 30–60 minutes or warm gently in a 300°F oven for 8–10 minutes if you like them a little soft and melty.
If you want to mix the dough ahead, keep it refrigerated for up to 24 hours and press into the pan right before baking. Let chilled dough sit at room temperature 10–15 minutes for easier pressing.
Your Questions, Answered
Can I use natural peanut butter? You can, but natural peanut butter separates and may create a slightly oilier dough and softer structure—use a no-stir or stabilized peanut butter for best texture.
Do I have to use Butterfinger pieces? No. They add crunch and a specific flavor. Replace them with chopped peanut M&Ms, toffee bits, or more chocolate chips if you prefer, but the bars will shift in flavor profile.
How thick should each bar be? Press the dough to an even layer in a 9×13″ pan; after baking and slicing, you’ll get medium-thick bars—about the same height as a standard cookie bar. Adjust thickness by using a smaller pan to get taller bars, but increase bake time slightly and watch for doneness.
Make It Tonight
Preheat to 350°F, gather your softened butter, peanut butter, and mix-ins, and you’ll have warm, sliceable bars in about 30 minutes of hands-on time plus 20–25 minutes in the oven. Follow the mix order: cream butter and peanut butter, add sugar, then egg and other wet ingredients, finish with flour and fold in the chips and Butterfinger. Press, bake, cool, and slice.
These are the kind of bars I keep in my freezer in case someone stops by unexpectedly. They travel well, please picky eaters, and cut into neat squares for taking to friends. Go on—make a pan tonight and see how fast they disappear.
Triple Threat Peanut Butter Cookie Bars
Ingredients
Ingredients
- 1/2 cup 113 g unsalted butter, softened
- 3/4 cup 200 g peanut butter(creamy or crunchy, use a no-stir brand)
- 1 cup 200 g packed brown sugar
- 1 large egg
- 1 teaspoonvanilla extract
- 1 tablespoonmilk
- 1/4 teaspoonsalt
- 1 teaspoonbaking soda
- 1 1/2 cupsall purpose flour
- 1 cuppeanut butter chips
- 1 cupchopped Butterfingers pieces
- 1 cupchocolate chips
Instructions
Instructions
- Preheat the oven to 350°F. Line a 9×13" pan with foil and spray the foil with nonstick cooking spray (leave some foil overhang to lift the bars out later).
- In a large bowl using a hand mixer or in the bowl of a stand mixer fitted with the paddle attachment, beat the softened unsalted butter and the peanut butter together until smooth.
- Add the packed brown sugar and beat until the mixture is creamy and combined.
- Add the egg, vanilla extract, milk, salt, and baking soda; mix until everything is incorporated.
- Gradually add the all-purpose flour and mix on low speed (or stir) until just combined and no large streaks of flour remain.
- Fold in the peanut butter chips, chocolate chips, and chopped Butterfinger pieces until evenly distributed through the dough.
- Transfer the dough to the prepared 9×13" pan and press it into an even layer using a spatula or your hands. If you like, sprinkle additional peanut butter chips and Butterfinger pieces over the top.
- Bake in the preheated oven for 20–25 minutes, or until the edges are golden brown and the center is set (a toothpick inserted near the center should come out with a few moist crumbs, not wet batter).
- Remove the pan from the oven and cool completely in the pan on a wire rack. Use the foil overhang to lift the bars from the pan, then slice into bars.
- Store cooled bars in an airtight container for up to 3 days, or freeze for up to one month.
Equipment
- 9x13-inch pan
- Foil
- Nonstick Cooking Spray
- hand mixer or stand mixer with paddle attachment
- Mixing Bowl
- Spatula
- Wire Rack
Notes
Nuts
Chopped Candy Bars
Chopped Oreos


