
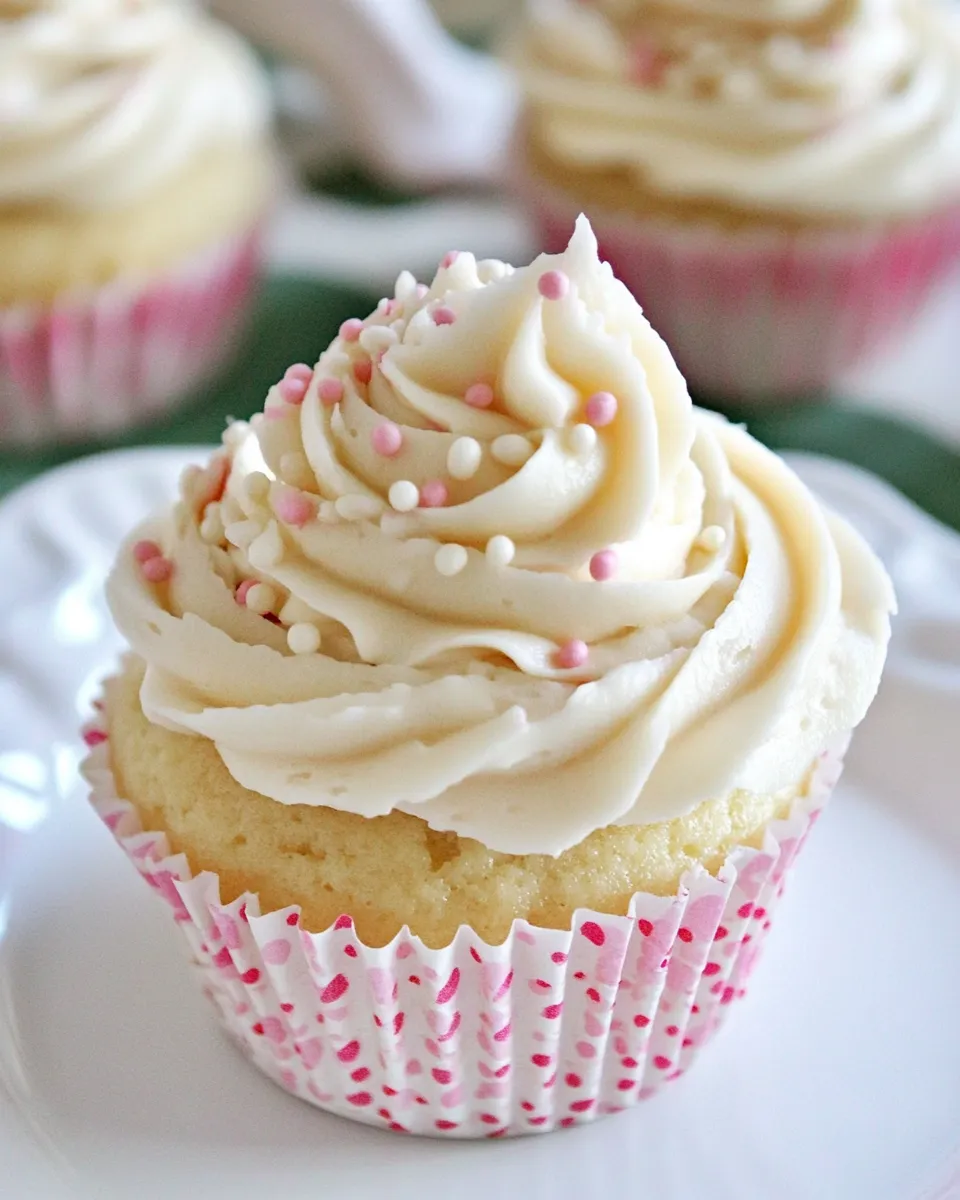
This buttercream is the workhorse frosting for wedding cupcakes: smooth, holdable, and reliably sweet without being cloying. It pipes clean roses and ruffles, spreads silky on a warm day if you dial in the cream, and stays white when you use clear vanilla. I write this from years of decorating and testing—simple technique, consistent results.
No tricks, just a few habits that make a big difference. Use room-temperature butter, sift or beat the powdered sugar in gradually, and taste as you go. Small adjustments to cream and speed will give you either a piping-ready buttercream or a softer spreadable frosting.
Below you’ll find concise ingredient notes, the step-by-step method from the tested source, and practical troubleshooting and pro tips so your wedding cupcakes look polished on the big day. Read the stages, gather your hardware, and you’ll be ready to buttercream with confidence.
Ingredient Notes

- 3 cups powdered sugar — Provides structure, sweetness, and that silky texture; add gradually to avoid a gritty frosting.
- 1 cup (2 sticks) butter, at room temperature — The base of the frosting; proper room temperature (soft but not greasy) ensures smooth whipping and stable peaks.
- 1 teaspoon vanilla extract (use clear extract, if you really want it white) — Adds flavor; clear vanilla keeps the buttercream bright white for wedding palettes.
- 1 to 2 tablespoons heavy or regular whipping cream — Controls consistency; use 1 tablespoon for stiffer piping, add up to 2 tablespoons for spreadable or softer piping textures.
Mastering Wedding Cupcake Buttercream: How-To
- Ensure the 1 cup (2 sticks) butter is at room temperature. Place the butter in a large mixing bowl.
- Using a hand mixer or stand mixer on low speed, add all 3 cups powdered sugar to the butter gradually and beat until the sugar and butter are well blended.
- Increase mixer speed to medium and beat for 3 minutes, stopping once to scrape down the sides and bottom of the bowl so the mixture is uniform.
- Add 1 teaspoon vanilla extract and 1 tablespoon of the heavy or regular whipping cream. Beat on medium speed for 1 minute, until the frosting is smooth.
- If the frosting is too stiff for spreading or piping, add the remaining cream (up to the 2nd tablespoon called for in the ingredients) a little at a time until you reach your desired consistency, mixing briefly after each addition.
- Scrape the frosting into a piping bag to pipe decoratively, or use a spatula to spread it onto cupcakes as desired.
What Makes This Recipe Special
There are a few things that set this buttercream above a run-of-the-mill frosting. First, the short ingredient list means less can go wrong. It’s essentially a classic American buttercream—but the directions prioritize texture by folding the sugar in on low speed and then whipping at medium for a clean, aerated finish. That step balances structure with lightness, which is crucial when piping detailed flowers or holding tall swirls on cupcakes.
Second, the flexible cream amount gives control. One tablespoon yields a firmer buttercream that keeps sharp piping details. The optional second tablespoon lets you soften it for glossy spreads or easier filling. Finally, the mention of clear vanilla is a small but important pro move for brides and bakers wanting pristine white frosting without a yellow tinge.
Smart Substitutions
If you need to tweak things without changing the outcome too much, these substitutions are practical and tested in small batches.
- Butter: Stick with unsalted butter for predictable salt levels. If you only have salted, omit any added salt in the cupcake batter and taste the frosting before piping.
- Vanilla: Clear vanilla extract is recommended to keep the frosting white. If you use regular vanilla, expect a slightly creamier color and a deeper vanilla note.
- Cream: Heavy cream gives a richer mouthfeel. If you don’t have cream, whole milk is acceptable in small amounts, but add more cautiously because it thins faster.
- Powdered sugar: Do not replace with granulated sugar; use only powdered (confectioners’) sugar for the proper texture and sweetness.
Hardware & Gadgets
You don’t need a commercial setup to get professional-looking cupcakes, but certain tools make the process faster and cleaner.
- Stand mixer with paddle or a hand mixer — saves time and gives consistent aeration.
- Large mixing bowl — roomy space prevents sugar clouds when adding powdered sugar.
- Flexible spatula — for scraping sides and transferring frosting to piping bags.
- Piping bags and tips — use a closed star or round tip for classic swirls; a large round tip is handy for simple, modern dots.
- Offset spatula — for smoothing tops when spreading rather than piping.
- Clear or white vanilla extract bottle — not a gadget, but keep a white vanilla if color matters.
Pitfalls & How to Prevent Them
Common issues are easy to avoid if you know the signals.
Frosting is grainy or gritty
Cause: Powdered sugar packed with lumps or not fully incorporated. Prevention: Sift the powdered sugar if it’s clumpy, or add it slowly on low speed until fully blended.
Frosting is too soft
Cause: Overheated butter or too much cream. Prevention: Use butter that’s soft but not greasy; add cream sparingly and chill the frosting briefly if it becomes floppy.
Frosting is too stiff
Cause: Too little cream or overbeating at low speed. Prevention: Add the second tablespoon of cream a little at a time until you hit the right pipeable consistency.
Color shifts yellow
Cause: Natural butter color or dark vanilla. Prevention: Use clear vanilla extract and, if you need an icier white, use European-style or blanched butters sparingly, or add a touch of white gel color.
Seasonal Ingredient Swaps
Wedding timelines vary, and ingredient availability shifts with seasons. These swaps adapt the basic recipe while preserving performance.
- Warm months: Use slightly less cream and chill the filled piping bag briefly before transport to prevent droop in heat.
- Cold months: Allow the butter to come fully to room temperature; cold butter makes the frosting stiff and harder to pipe evenly.
- Flavoring for seasons: In autumn, a touch of maple or brown butter flavoring works beautifully—add sparingly to preserve color and texture.
Pro Perspective
Bakers who do weddings learn two truths fast: consistency matters more than maximal richness, and simplicity reduces risk. This buttercream wins on both counts. The method reduces variations by standardizing butter temperature, adding sugar gradually, and using two controlled whipping stages. That creates a frosting that holds shape but is forgiving during transport.
For shows and photos, I often pipe a practice cupcake or two and make micro-adjustments to cream and speed. That saves cupcakes at the event and ensures every swirl matches the others. Finally, keep spare frosting in a covered container—it’s easier to touch up a few cupcakes than redo whole batches.
Make Ahead Like a Pro
Planning ahead reduces stress on wedding day. Here’s a practical timeline that keeps frosting fresh and stable.
- Make the buttercream up to 48 hours ahead. Store it in an airtight container in the refrigerator.
- Bring the chilled buttercream to room temperature, then whip briefly (30–45 seconds) on medium to restore its fluff before piping.
- For full-scale production, pipe cupcakes the day before and store them in a single layer in a covered box. If toppers or delicate decorations are used, add them the morning of the event.
Handy Q&A
-
Q: Can I color this buttercream for wedding palettes?
A: Yes. Use gel or paste colors sparingly to avoid thinning. Add color after step 4 and whip briefly to incorporate. -
Q: How much frosting does this recipe yield?
A: This batch gives enough to generously top about 12 standard cupcakes, depending on how tall you pipe. -
Q: Can I freeze this buttercream?
A: You can freeze in an airtight container up to one month. Thaw in the fridge overnight, bring to room temperature, and re-whip briefly before use. -
Q: Does the recipe work for cake layers?
A: Yes, for filling and thin crumb coats. For full layer cakes, double or triple the recipe depending on cake size.
Make It Tonight
Short on time? Follow these focused steps and you’ll have wedding-worthy buttercream in under 20 minutes.
- Bring the 1 cup (2 sticks) butter to room temperature while you set out tools.
- Place the butter in a large mixing bowl and, on low speed, add all 3 cups powdered sugar gradually until blended.
- Beat on medium for 3 minutes, scrape the bowl, then add 1 teaspoon vanilla extract and 1 tablespoon cream and beat another minute.
- Test consistency. If too stiff, add the remaining cream a little at a time. Scrape into a piping bag and pipe immediately.
Keep a small extra bowl of frosting ready for touch-ups. With those steps, you’ll have clean, stable buttercream that pipes beautifully and holds up through service.

Wedding Cupcake Buttercream
Ingredients
Ingredients
- 3 cupspowdered sugar
- 1 cup 2 sticksbutter, at room temperature
- 1 teaspoonvanilla extract use clear extract, if you really want it white
- 1 to 2 tablespoonsheavy or regular whipping cream
Instructions
Instructions
- Ensure the 1 cup (2 sticks) butter is at room temperature. Place the butter in a large mixing bowl.
- Using a hand mixer or stand mixer on low speed, add all 3 cups powdered sugar to the butter gradually and beat until the sugar and butter are well blended.
- Increase mixer speed to medium and beat for 3 minutes, stopping once to scrape down the sides and bottom of the bowl so the mixture is uniform.
- Add 1 teaspoon vanilla extract and 1 tablespoon of the heavy or regular whipping cream. Beat on medium speed for 1 minute, until the frosting is smooth.
- If the frosting is too stiff for spreading or piping, add the remaining cream (up to the 2nd tablespoon called for in the ingredients) a little at a time until you reach your desired consistency, mixing briefly after each addition.
- Scrape the frosting into a piping bag to pipe decoratively, or use a spatula to spread it onto cupcakes as desired.
Equipment
- Large Mixing Bowl
- Hand mixer or stand mixer
- Spatula
- Piping Bag
Notes
*There is no need to sift the powdered sugar, unless you're worried that your sugar is quite lumpy.
*Do not try to replace the butter with margarine or shortening- it won't work out well.
*Add in color, if desired. I like to use colored gel paste instead of liquid food coloring- then you're not messing with adding additional liquid to the perfect consistency of the frosting. Gel paste is sold at craft stores and baking supply shops.


