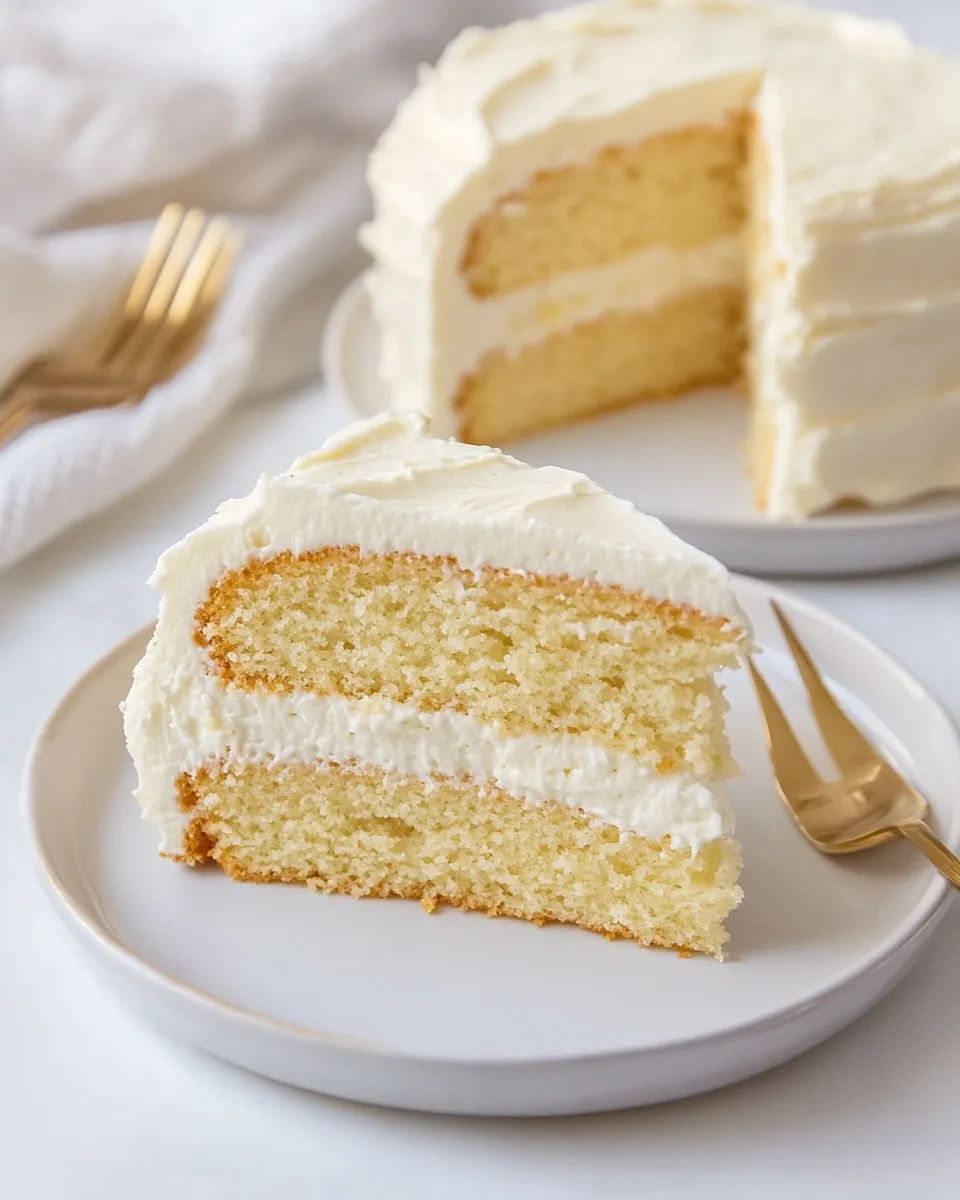
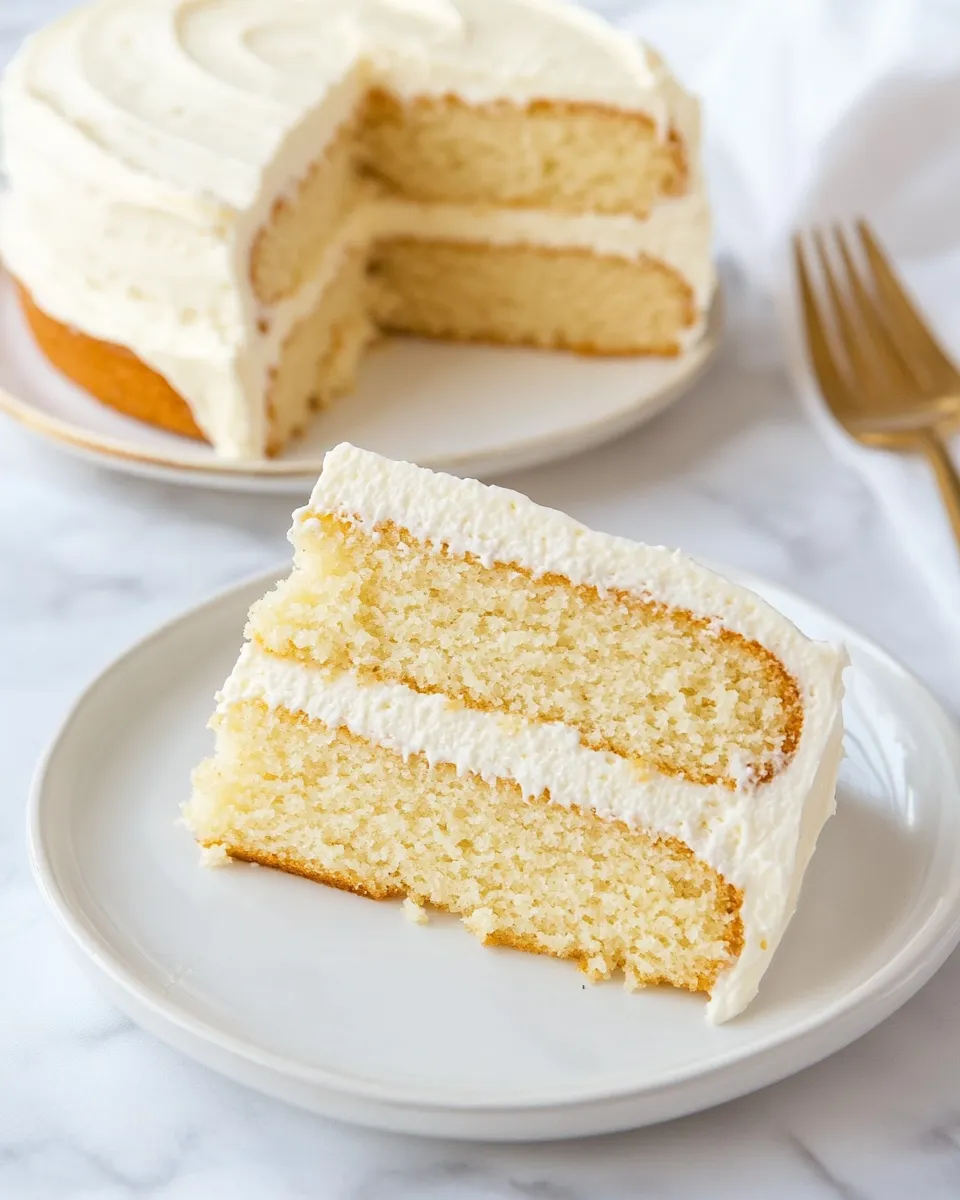
I make this vanilla cake when someone needs a simple, reliable dessert that sidesteps dairy and gluten without sacrificing the classic, tender crumb of a good layer cake. It’s balanced, easy to assemble, and built around pantry-friendly items like gluten-free flour, canned coconut milk, and avocado oil. The frosting is a straightforward vegan buttercream that stays soft and spreadable thanks to a touch of canned coconut milk.
This recipe works well for birthdays, small celebrations, or when a weekday cake is in order. The method is forgiving: you mix dry and wet separately, combine, bake, cool, and frost. Baking times are short, and the cakes hold up nicely for stacking and decorating.
I’ll walk you through every step, explain what each ingredient is doing, and offer practical tips for a tidy finish. There are no exotic techniques here — just clear, repeatable steps that yield a reliably delicious Dairy-Free Gluten-Free Vanilla Cake.
Ingredient List
- 2 ⅓ cups (320g) gluten-free all-purpose flour — the structure of the cake; use a blend with xanthan or guar for best rise.
- 1 ½ cups (330g) granulated sugar — primary sweetener and contributes to tenderness and browning.
- 1 tsp sea salt — balances sweetness and strengthens flavor.
- 2 tsp baking powder — main leavening agent to give lift and lightness.
- 1/4 tsp baking soda — works with the other acids and alkalies for a balanced crumb.
- 3/4 cup (175ml) avocado oil — keeps the cake moist and adds a neutral richness.
- 1 cup (225ml) full-fat canned coconut milk — provides fat, moisture, and a subtle roundness without dairy.
- 3 large eggs — binders and leavening support; add structure and richness.
- 1 Tbsp pure vanilla extract — the vanilla backbone for flavor.
- 2 sticks (1 cup, 230g) vegan butter* — for the frosting’s creamy base and mouthfeel.
- 4 to 6 cups (480-600g) powdered sugar** — sweetens and thickens the frosting; add to taste and texture.
- 6 to 8 Tbsp (80-100ml) full-fat canned coconut milk, as needed*** — thins and enriches the frosting so it spreads smoothly.
- 1 tsp pure vanilla extract — for the frosting; reinforces the cake’s vanilla profile.
- Pinch sea salt — rounds out the sweetness in the frosting.
Dairy-Free Gluten-Free Vanilla Cake in Steps
- Preheat the oven to 350°F (175°C). Grease the sides of two 8-inch springform pans and line the bottoms with rounds of parchment paper.
- In a large bowl, whisk together the dry ingredients: 2 1/3 cups (320 g) gluten-free all-purpose flour, 1 1/2 cups (330 g) granulated sugar, 1 tsp sea salt, 2 tsp baking powder, and 1/4 tsp baking soda until evenly combined.
- In a separate bowl, whisk the wet ingredients: 3/4 cup (175 ml) avocado oil, 1 cup (225 ml) full-fat canned coconut milk, 3 large eggs, and 1 Tbsp pure vanilla extract. If the canned coconut milk has separated, warm it briefly (for example, in a jar in the microwave) until it stirs together smoothly.
- Pour the dry ingredients into the wet ingredients and mix until a smooth, homogenous cake batter forms. Avoid overmixing.
- Divide the batter evenly between the two prepared pans and smooth the tops. Bake on the center oven rack for 23–28 minutes, or until the cakes are set and a toothpick inserted into the center comes out clean or with a few moist crumbs. (If you are at high altitude you may need to bake toward the higher end of the range.)
- Remove the cakes from the oven and let them sit in the pans for about 10–15 minutes. Run a knife around the pan edges, release the springform rings, then transfer the cakes (with parchment) to a wire rack. Remove the parchment and let the cakes cool completely to room temperature on the rack before frosting.
- While the cakes cool (or after they are cool), make the frosting. Using a stand mixer fitted with the paddle attachment or a handheld mixer, beat 2 sticks (1 cup, 230 g) vegan butter until creamy.
- Add half of the powdered sugar (from the 4–6 cups/480–600 g), the full-fat canned coconut milk called for for the frosting (6–8 Tbsp / 80–100 ml, as needed), 1 tsp pure vanilla extract, and a pinch of sea salt. Beat on low speed until the sugar starts to incorporate, then beat on high speed for 2 minutes.
- Check the frosting for consistency and flavor. Add the remaining powdered sugar a little at a time until the frosting reaches your desired sweetness and thickness. If the frosting is too thick, add small amounts of the canned coconut milk until it is spreadable.
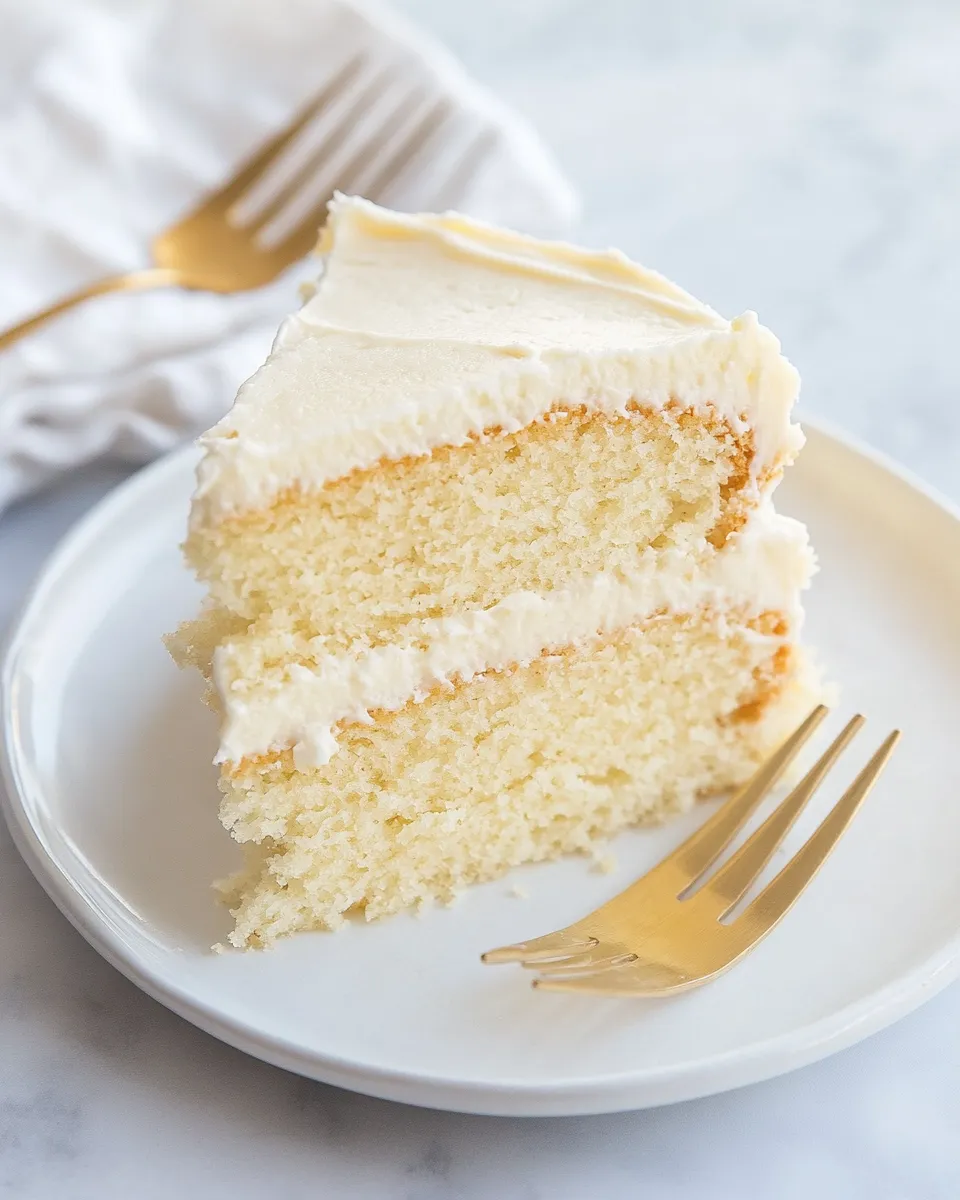
- To assemble, place one cooled cake layer rounded side down on a serving plate or cake stand so the top is flat. Spread a generous layer of frosting (about 1/2 inch thick) over this layer. If you like, add a fruit layer here (chopped strawberries or mashed raspberries).
- Place the second cake layer rounded side down on top. Trim the domes if you prefer the cake to sit flat. Frost the top and sides of the cake as desired. For a neater finish, you may apply a thin crumb coat first, chill briefly to set, then apply the final layer of frosting.
- Decorate the cake as you like, slice, and serve. Enjoy!
Reasons to Love Dairy-Free Gluten-Free Vanilla Cake
This cake proves dietary restrictions don’t have to mean compromise. It’s moist, tender, and reliably neutral in flavor — the perfect canvas for fruit, jams, or a simple vanilla buttercream. The use of avocado oil and coconut milk keeps the crumb tender and rich without dairy, and the gluten-free flour makes it accessible to anyone avoiding gluten.
It’s quick to mix and bakes fast. Two thin layers mean short bake times and easy cooling. The frosting is adaptable: adjust powdered sugar for sweetness and coconut milk for texture, and you’ll have a spreadable, stable buttercream that holds up at room temperature for serving.
If You’re Out Of…
If you find yourself missing an item from the ingredient list, first check whether you have another listed ingredient that can serve the same purpose. For example, if one can of full-fat canned coconut milk is reserved for the frosting, you can use another can for the batter if needed. When supplies are tight, prioritize the key items: gluten-free flour for structure, an adequate fat (the avocado oil), eggs for lift and bind, and a leavening agent.
If you’re out of springform pans, use any round 8-inch pans you have and allow the cakes to cool in-pan for a short time before carefully turning them out. If parchment rounds are missing, line the bottoms with a piece of parchment cut to size, or ensure the pan is well greased so the cake releases cleanly.
Setup & Equipment
Get organized before you start. Preheat the oven, measure dry and wet separately, and line your pans up front. This recipe benefits from a few small setup steps that make assembly smoother:
- Pans: Two 8-inch springform pans are specified. If you don’t have springform pans, standard 8-inch round cake pans work fine.
- Mixing bowls: One large for dry ingredients, one medium for wet ingredients.
- Whisk and spatula: For even mixing and scraping batter into pans.
- Stand mixer or handheld mixer: For creaming the vegan butter and building a smooth frosting.
- Wire rack: For cooling cakes completely before frosting.
Troubles You Can Avoid
Common issues are overmixing, underbaking, and frosting with warm cake. Mix the batter only until it’s homogenous — overmixing with gluten-free flour can make textures gummy. Use the toothpick test and watch the oven closely during the 23–28 minute window. Let the cakes cool completely before frosting; warm cake will melt the frosting and make decorating difficult.
For a tidy finish, do a quick crumb coat: spread a thin layer of frosting, chill the cake until the layer sets, then finish with a final coat. This reduces crumbs in the outer layer and gives a smoother result.
Nutrition-Minded Tweaks
You can manage sweetness and fat by small adjustments. Use the lower end of the powdered sugar range for a less-sweet frosting. If you need smaller portions, cut cake slices thinner. The recipe already uses avocado oil rather than butter in the batter; the fat choice gives a slightly lighter mouthfeel compared to all-butter cakes.
Note: Because the recipe uses full-fat coconut milk and vegan butter, it remains relatively rich. If you need to reduce calories, focus on portion control and serving sizes rather than swapping core ingredients — major swaps can change texture and structure.
Flavor Logic
Vanilla is the guiding flavor here. The tablespoon in the batter and the teaspoon in the frosting layer vanilla into both cake and buttercream so every bite tastes cohesive. Avocado oil provides neutral fat that carries flavor without adding taste, while full-fat canned coconut milk gives richness and a subtle roundness that mimics dairy behavior. Eggs are necessary for structure and lift, especially in a gluten-free batter where you don’t have gluten to build the matrix.
The vegan butter and powdered sugar create a classic buttercream texture; the extra coconut milk tones the butterfat and ensures spreadability. The pinch of salt in both the batter and frosting keeps the sweetness balanced and bright.
Storage & Reheat Guide
Store the finished cake in the refrigerator for up to 4 days, lightly covered or in a cake keeper to prevent odor transfer. If you plan to serve at room temperature, remove the cake 30–60 minutes before serving so the frosting softens and the cake flavors open up.
For longer storage, freeze the whole cake or individual slices. Wrap tightly in plastic wrap and then foil; freeze for up to 2 months. Thaw in the refrigerator overnight, then bring to room temperature before serving for best texture.
Troubleshooting Q&A
My cake sank in the middle — why?
Most likely underbaked or opened oven too early. Make sure the toothpick comes out clean or with a few moist crumbs and avoid opening the oven during the bulk of the bake.
The crumb feels gummy — what happened?
Possible overmixing after adding the dry ingredients, or your gluten-free blend lacks stabilizers like xanthan gum. Mix until just combined and consider a blend designed for cake-like textures.
Frosting is too runny or too thick — how to fix it?
If too thin, add powdered sugar a little at a time until it firms up. If too thick, add the canned coconut milk, a teaspoon at a time, until you reach spreadable consistency.
The Last Word
This Dairy-Free Gluten-Free Vanilla Cake is a dependable, crowd-pleasing recipe that delivers classic vanilla flavor with a tender crumb, all without dairy or gluten. It’s quick to prepare, forgiving in technique, and adaptable when it comes to frosting consistency. Follow the steps, take your time cooling and frosting, and you’ll end up with a cake that looks and tastes like a celebration — no special equipment or rare ingredients required.
Dairy-Free Gluten-Free Vanilla Cake
Ingredients
Ingredients
- 2 1/3 cups 320 g gluten-free all-purpose flour
- 1 1/2 cups 330 g granulated sugar
- 1 tspsea salt
- 2 tspbaking powder
- 1/4 tspbaking soda
- 3/4 cup 175 mlavocado oil
- 1 cup 225 mlfull-fat canned coconut milk
- 3 large eggs
- 1 Tbsppure vanilla extract
- 2 sticks 1 cup, 230 gvegan butter*
- 4 to 6 cups 480-600 gpowdered sugar**
- 6 to 8 Tbsp 80-100 mlfull-fat canned coconut milk, as needed***
- 1 tsppure vanilla extract
- Pinchsea salt
Instructions
Instructions
- Preheat the oven to 350°F (175°C). Grease the sides of two 8-inch springform pans and line the bottoms with rounds of parchment paper.
- In a large bowl, whisk together the dry ingredients: 2 1/3 cups (320 g) gluten-free all-purpose flour, 1 1/2 cups (330 g) granulated sugar, 1 tsp sea salt, 2 tsp baking powder, and 1/4 tsp baking soda until evenly combined.
- In a separate bowl, whisk the wet ingredients: 3/4 cup (175 ml) avocado oil, 1 cup (225 ml) full-fat canned coconut milk, 3 large eggs, and 1 Tbsp pure vanilla extract. If the canned coconut milk has separated, warm it briefly (for example, in a jar in the microwave) until it stirs together smoothly.
- Pour the dry ingredients into the wet ingredients and mix until a smooth, homogenous cake batter forms. Avoid overmixing.
- Divide the batter evenly between the two prepared pans and smooth the tops. Bake on the center oven rack for 23–28 minutes, or until the cakes are set and a toothpick inserted into the center comes out clean or with a few moist crumbs. (If you are at high altitude you may need to bake toward the higher end of the range.)
- Remove the cakes from the oven and let them sit in the pans for about 10–15 minutes. Run a knife around the pan edges, release the springform rings, then transfer the cakes (with parchment) to a wire rack. Remove the parchment and let the cakes cool completely to room temperature on the rack before frosting.
- While the cakes cool (or after they are cool), make the frosting. Using a stand mixer fitted with the paddle attachment or a handheld mixer, beat 2 sticks (1 cup, 230 g) vegan butter until creamy.
- Add half of the powdered sugar (from the 4–6 cups/480–600 g), the full-fat canned coconut milk called for for the frosting (6–8 Tbsp / 80–100 ml, as needed), 1 tsp pure vanilla extract, and a pinch of sea salt. Beat on low speed until the sugar starts to incorporate, then beat on high speed for 2 minutes.
- Check the frosting for consistency and flavor. Add the remaining powdered sugar a little at a time until the frosting reaches your desired sweetness and thickness. If the frosting is too thick, add small amounts of the canned coconut milk until it is spreadable.
- To assemble, place one cooled cake layer rounded side down on a serving plate or cake stand so the top is flat. Spread a generous layer of frosting (about 1/2 inch thick) over this layer. If you like, add a fruit layer here (chopped strawberries or mashed raspberries).
- Place the second cake layer rounded side down on top. Trim the domes if you prefer the cake to sit flat. Frost the top and sides of the cake as desired. For a neater finish, you may apply a thin crumb coat first, chill briefly to set, then apply the final layer of frosting.
- Decorate the cake as you like, slice, and serve. Enjoy!
Equipment
- 8-inch springform pans
- Parchment Paper
- Large Bowl
- Stand mixer
- paddle attachment
- Handheld mixer
- Wire Rack
- Knife
Notes
*Use Earth Balance butter or Miyokos. If you aren’t dairy-free, use regular butter.
**Base the amount on the consistency and sweetness you’re going for.
***If you aren’t dairy-free, use heavy cream.
Cakes are considered fully cooked when they have reached an internal temperature of 190 to 200 degrees Fahrenheit. You can insert an instant read thermometer into the center of the cakes to verify the temperatures.
Nutrition Facts are for the exact recipe as written, including the buttercream.