

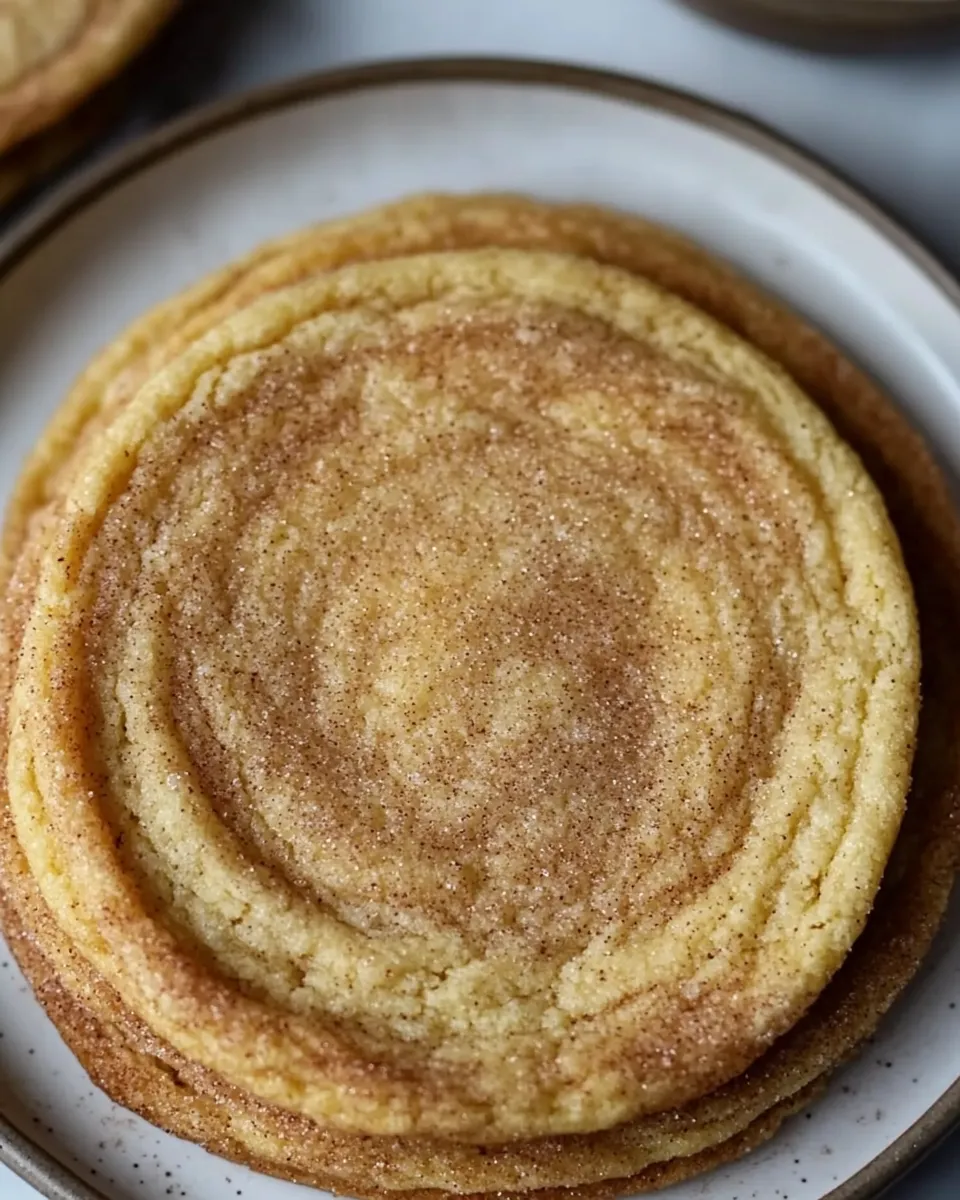
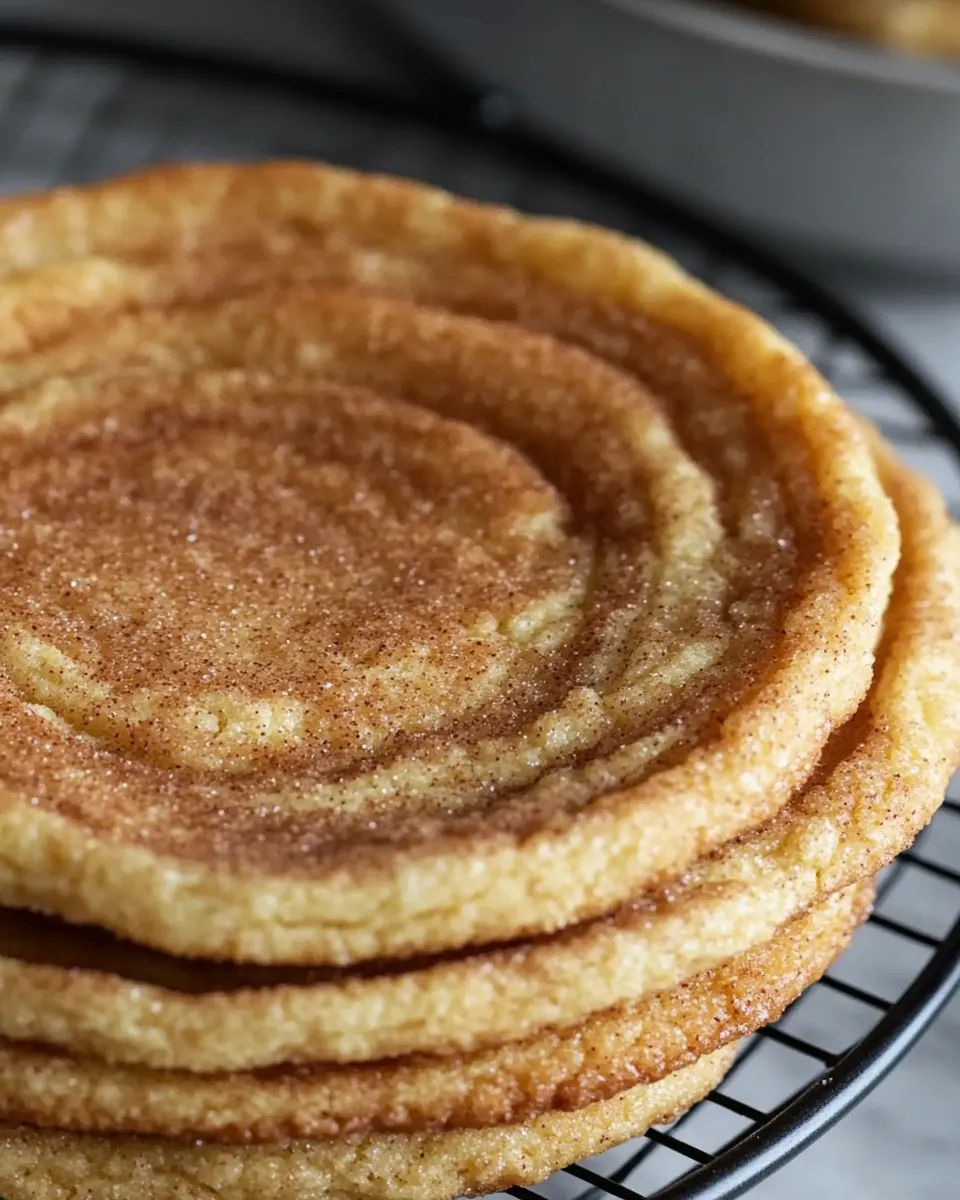
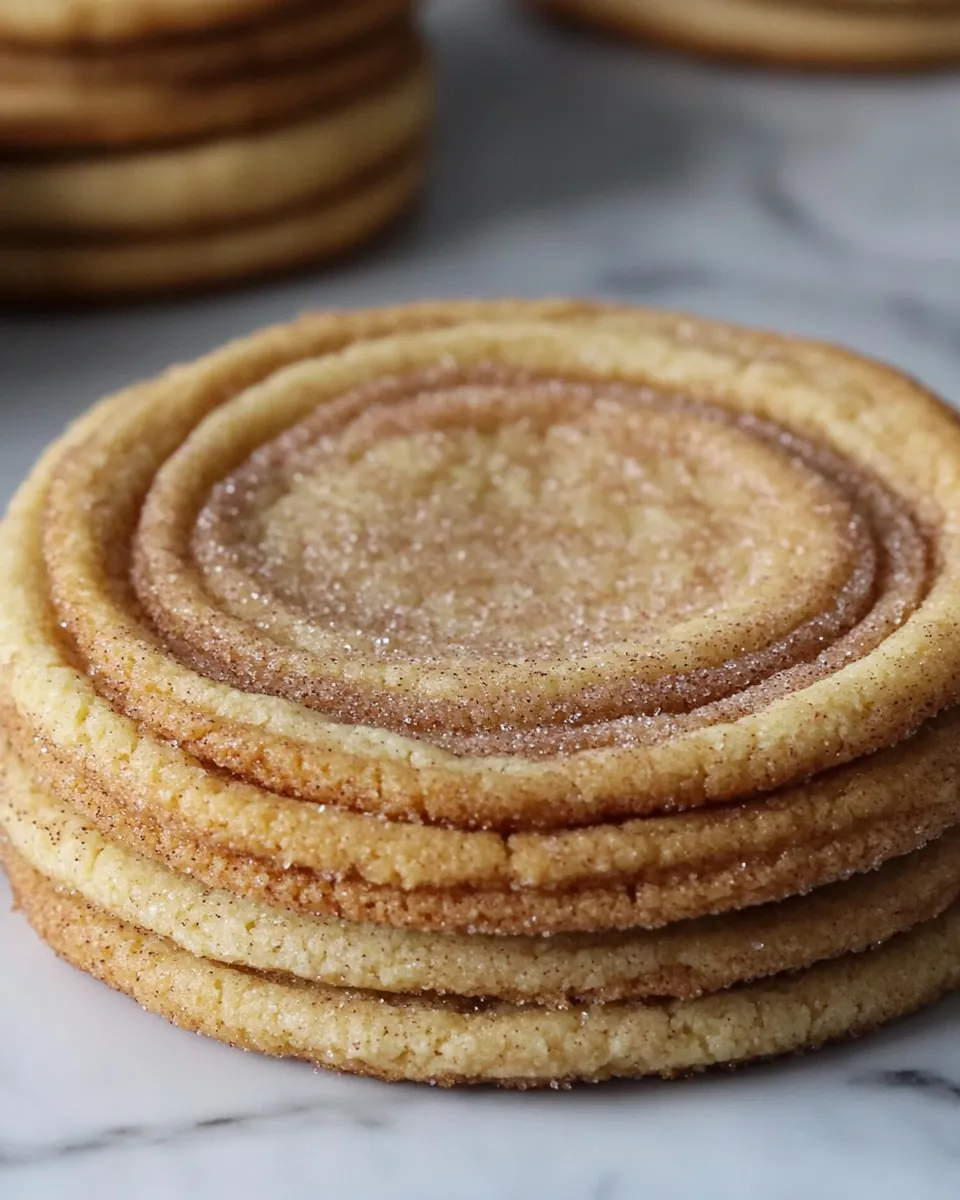
I make these cookies when I want a reliable, no-surprise treat that still delivers contrast: crackly edges, soft centers, and a warm cinnamon note. The “pan-banging” step—dropping the hot pan so the centers deflate a touch—sounds dramatic, but it’s exactly what gives these snickerdoodles that classic thin-crisp edge and tender middle. It’s cooking with intention, not gimmickry.
This recipe is straightforward and forgiving. It uses familiar pantry staples and one small flourish: freshly grated nutmeg. That whisper of nutmeg lifts the cinnamon-sugar and keeps the flavor rounded. You’ll work through a standard creaming method, then finish with the rhythmic lift-and-drop routine while the cookies bake.
Below you’ll find everything you need: a pared-down ingredients list with quick notes, step-by-step directions straight from the recipe, practical troubleshooting, swap ideas, and storage tips. Read through the essentials once, then follow the directions without skipping the mid-bake pan drops—the trick is in the rhythm.
The Essentials
These cookies bake at 350°F and the total bake time per sheet pan is 14–15 minutes, with an active five to six minute period of lift-and-drop repetitions after the initial 8-minute bake. You’ll bake one sheet pan at a time on the middle rack. Use aluminum foil, dull-side up, on your pans so the cookies don’t stick and cleanup is quick. A stand mixer with a paddle attachment speeds things, but you can do the creaming by hand if needed.
Key technique points: cream the butter and sugar until light, don’t overmix once you add the flour, and watch the cookies closely during the 8–15 minute window. The visual cue matters: edges should be golden while centers remain noticeably lighter. The lift-and-drop sets the edges and allows the centers to collapse just enough for that signature texture.
Ingredients
- 2 cups all-purpose flour — provides structure; measure properly (spoon into the cup and level).
- 1 teaspoon baking soda — the main leavening agent that helps with spread and lift.
- 3/4 teaspoon kosher salt — balances sweetness and enhances flavor.
- 1/2 teaspoon cream of tartar — gives the snickerdoodle tang and helps with chew.
- 1/4 teaspoon freshly grated nutmeg — aromatic lift; grate with a Microplane for the best texture.
- 1 cup unsalted butter, room temperature — richness and tenderness; room temp lets it cream properly.
- 1 3/4 cups granulated sugar — sweetness and structure; recipe splits some for rolling to build a cinnamon crust.
- 1 large egg — binds and adds moisture; use at room temperature if possible.
- 1 teaspoon pure vanilla extract — rounds and deepens flavor.
- 1 tablespoon cinnamon — paired with sugar for the classic snickerdoodle coating.
Directions: Pan-Banging Snickerdoodle Cookies
- Position an oven rack in the middle of the oven and preheat the oven to 350°F. Line three sheet pans with aluminum foil, dull-side up. (You will bake one pan at a time.)
- In a small bowl, whisk together 2 cups all-purpose flour, 1 teaspoon baking soda, 3/4 teaspoon kosher salt, 1/2 teaspoon cream of tartar, and 1/4 teaspoon freshly grated nutmeg (use a Microplane zester).
- In the bowl of a stand mixer fitted with the paddle attachment, beat 1 cup unsalted butter (room temperature) on medium speed until creamy, about 1 minute.
- Add 1 1/2 cups granulated sugar to the butter and beat on medium speed until light and fluffy, about 2–3 minutes. Scrape down the bowl as needed.
- Add 1 large egg and 1 teaspoon pure vanilla extract and mix on low speed just until combined.
- Add the flour mixture and mix on low speed until just combined; do not overmix.
- In a small bowl, combine the remaining 1/4 cup granulated sugar and 1 tablespoon cinnamon.
- Portion the dough into 3-ounce balls (about 1/4 cup each). Roll each ball in the cinnamon-sugar mixture to coat. Optional: press a little extra cinnamon-sugar on top of each dough ball for darker cinnamon streaks.
- Place 3 or 4 dough balls on a prepared sheet pan, spaced evenly to allow for spreading. Bake one pan at a time on the middle rack.
- Bake for 8 minutes, until the dough balls have flattened and are slightly puffed in the center.
- Wearing oven mitts, open the oven, lift the sheet pan about 4 inches, and gently drop it straight down onto the oven rack so the cookie edges set and the centers fall slightly. Close the oven and let the cookies rest in the oven for 2 minutes.
- Repeat the lift-and-drop cycle every 2 minutes as the cookies puff back up, until the total bake time for that pan reaches 14–15 minutes. The cookies are done when they have spread and the edges are golden brown while the centers remain much lighter.
- Transfer the sheet pan to a cooling rack and let the cookies cool on the pan for 10 minutes. Then transfer the cookies to the cooling rack to cool to room temperature.
- Notes: Cookies are crispiest and chewiest on the day they are made. Store in an airtight container for up to 2 days or refrigerate for up to 3 days. They are also enjoyable chilled.
Reasons to Love Pan-Banging Snickerdoodle Cookies
These cookies hit classic textures and flavors without a complicated recipe. You get the tactile pleasure of the thin, crackled edge and the soft, slightly tangy center from the cream of tartar. The cinnamon-sugar crust gives a toasted spice on first bite, while the nutmeg adds depth without stealing the show.
They’re also very adaptable to how you bake: the lift-and-drop step is a simple mechanical trick that requires only practice to time right. It gives even home bakers a consistent result you’ll feel proud to serve. Finally, the method is forgiving—slight differences in room temperature or mixing time won’t ruin the cookies; they’ll just change how much they spread, which you can manage with spacing and pan temperature.
Swap Guide
- Unsalted butter — If you prefer salted butter, reduce the added salt slightly or taste the dough before baking; salted butter will increase the savory-sweet balance.
- Granulated sugar — You can experiment by replacing up to half with a coarse caster sugar for a different crunch, but start small to see how it affects spread.
- Nutmeg — If you don’t have fresh nutmeg, omit it; the cinnamon-sugar will still carry the cookie. Freshly grated nutmeg is subtler and more aromatic than pre-ground.
- Aluminum foil lining — Parchment paper works, too, but using foil dull-side up keeps bottoms from browning too quickly on older pans.
Equipment & Tools
- Stand mixer with paddle attachment — speeds up creaming; you can substitute a handheld mixer or sturdy whisk if needed.
- Measuring cups and spoons — accurate measuring makes a big difference in texture.
- Microplane zester — for the nutmeg; a fine grate releases aroma without chunks.
- Three sheet pans — you line them but bake one at a time; rotating pans while dough chills between batches helps if you’re timing a party.
- Cooling rack — cools the cookies evenly and prevents soggy bottoms.
- Oven mitts — for lifting and dropping the pan safely.
Missteps & Fixes
Cookies didn’t spread enough
Possible causes: butter was too cold, dough was too stiff from overmeasuring flour, or the oven was too cool. Fixes: let the butter come fully to room temperature next time (soft but not oily), spoon and level flour instead of scooping, and verify oven temperature with an oven thermometer.
Cookies spread too much / became flat and greasy
Possible causes: butter too soft or warm, too little flour, or overbeating after adding flour. Fixes: chill the dough slightly before rolling into balls, return to a firmer butter, and mix just until the flour disappears.
Edges browned too quickly
Use the middle rack and the dull side of foil as instructed. If your pan conducts heat aggressively, try a heavier pan or line with parchment to buffer heat transfer.
Texture not right after bake
If centers are too raw after 15 minutes, your oven may run cool; add 1–2 minutes. If centers are too dry, shorten the bake by a minute or reduce the oven temperature by 10–15°F next time and monitor the 8–15 minute window closely.
Holiday & Seasonal Touches
These cookies sit comfortably on any holiday cookie plate because they’re simple and pair well with other flavors. For an autumn twist, serve with a caramel dipping sauce nearby or press a single almond in the center after rolling in the cinnamon-sugar. Since the recipe already calls for freshly grated nutmeg, highlight that by offering them warm with a hot toddy or spiced cider.
At winter gatherings, make smaller 2-ounce dough balls and increase the bake time slightly (watch the 8-minute mark carefully) for bite-sized cookies that present well on platters. The cinnamon-sugar topping makes them look festive without extra decoration.
If You’re Curious
Why the cream of tartar? It adds a subtle acidity that brightens the cookie and prevents excessive spread, giving snickerdoodles their classic tang and tender chew. Why lift-and-drop? The technique sets the edges quickly by shocking the pan and dough, allowing the centers to fall and create that signature contrast between crisp rim and soft middle.
Why split the sugar? A larger portion of the sugar goes into the dough to structure and tenderize; the reserved 1/4 cup is for rolling, which creates a caramelized exterior and immediate cinnamon punch. Fresh nutmeg is stronger and more complex than pre-ground, which is why the recipe specifies grating it fresh.
Shelf Life & Storage
Cookies are crispiest and chewiest on the day they are made. Store in an airtight container for up to 2 days at room temperature. If you prefer a firmer texture, refrigerate for up to 3 days; the refrigerator will firm the cookie and reduce chew. These cookies are also enjoyable chilled straight from the fridge.
If you need to freeze, flash-freeze on a sheet pan, then transfer to a freezer bag for up to one month. Thaw at room temperature for 20–30 minutes or warm briefly in a low oven to restore some crispness.
Troubleshooting Q&A
- Q: My cookies are puffy and cakey. A: You likely over-creamed the butter and sugar or added too much flour. Cream just until light and fold flour in on low speed. Check your measuring method.
- Q: The cookies are greasy. A: Butter may have been too warm. Chill the dough slightly before rolling next time and bake promptly.
- Q: The centers never set. A: Your oven might be running cool; use an oven thermometer. Also ensure you complete the lift-and-drop cycles through the 14–15 minute total bake time.
- Q: The cinnamon-sugar didn’t stick. A: Pressing a bit more of the mixture onto the top of each ball—an optional step—helps create darker cinnamon streaks and better adhesion.
That’s a Wrap
These Pan-Banging Snickerdoodle Cookies are a practical, dependable recipe that rewards attention to technique more than fancy ingredients. The special bit—the lift, the drop, the rhythm—takes a few batches to get comfortable with, but it’s worth it. You’ll end up with cookies that look like they belonged on a bakery tray and taste like the classic you remember.
Make a batch, note how your oven behaves, and adjust the small details (butter temp, spacing, and timing) until you find the rhythm that works for you. Then bake them again—family, friends, and weekday moments all appreciate a cookie that’s crisp at the edges and soft at the center.
Pan-Banging Snickerdoodle Cookies
Ingredients
Ingredients
- 2 c.all-purpose flour
- 1 tsp.baking soda
- 3/4 tsp.kosher salt
- 1/2 tsp.cream of tartar
- 1/4 tsp.freshly grated nutmeg – use a Microplane zester to grate
- 1 c.unsalted butterat room temperature
- 1.75 c.granulated sugar
- 1 large egg
- 1 tsp.pure vanilla extract
- 1 T.cinnamon
Instructions
Instructions
- Position an oven rack in the middle of the oven and preheat the oven to 350°F. Line three sheet pans with aluminum foil, dull-side up. (You will bake one pan at a time.)
- In a small bowl, whisk together 2 cups all-purpose flour, 1 teaspoon baking soda, 3/4 teaspoon kosher salt, 1/2 teaspoon cream of tartar, and 1/4 teaspoon freshly grated nutmeg (use a Microplane zester).
- In the bowl of a stand mixer fitted with the paddle attachment, beat 1 cup unsalted butter (room temperature) on medium speed until creamy, about 1 minute.
- Add 1 1/2 cups granulated sugar to the butter and beat on medium speed until light and fluffy, about 2–3 minutes. Scrape down the bowl as needed.
- Add 1 large egg and 1 teaspoon pure vanilla extract and mix on low speed just until combined.
- Add the flour mixture and mix on low speed until just combined; do not overmix.
- In a small bowl, combine the remaining 1/4 cup granulated sugar and 1 tablespoon cinnamon.
- Portion the dough into 3-ounce balls (about 1/4 cup each). Roll each ball in the cinnamon-sugar mixture to coat. Optional: press a little extra cinnamon-sugar on top of each dough ball for darker cinnamon streaks.
- Place 3 or 4 dough balls on a prepared sheet pan, spaced evenly to allow for spreading. Bake one pan at a time on the middle rack.
- Bake for 8 minutes, until the dough balls have flattened and are slightly puffed in the center.
- Wearing oven mitts, open the oven, lift the sheet pan about 4 inches, and gently drop it straight down onto the oven rack so the cookie edges set and the centers fall slightly. Close the oven and let the cookies rest in the oven for 2 minutes.
- Repeat the lift-and-drop cycle every 2 minutes as the cookies puff back up, until the total bake time for that pan reaches 14–15 minutes. The cookies are done when they have spread and the edges are golden brown while the centers remain much lighter.
- Transfer the sheet pan to a cooling rack and let the cookies cool on the pan for 10 minutes. Then transfer the cookies to the cooling rack to cool to room temperature.
- Notes: Cookies are crispiest and chewiest on the day they are made. Store in an airtight container for up to 2 days or refrigerate for up to 3 days. They are also enjoyable chilled.
Equipment
- 100 Cookies by Sarah Kieffer
- Cream Of Tartar
- Microplane Zester
- Kitchen scale
Notes
From
100 Cookies
by Sarah Kieffer of the
The Vanilla Bean Blog
.


