

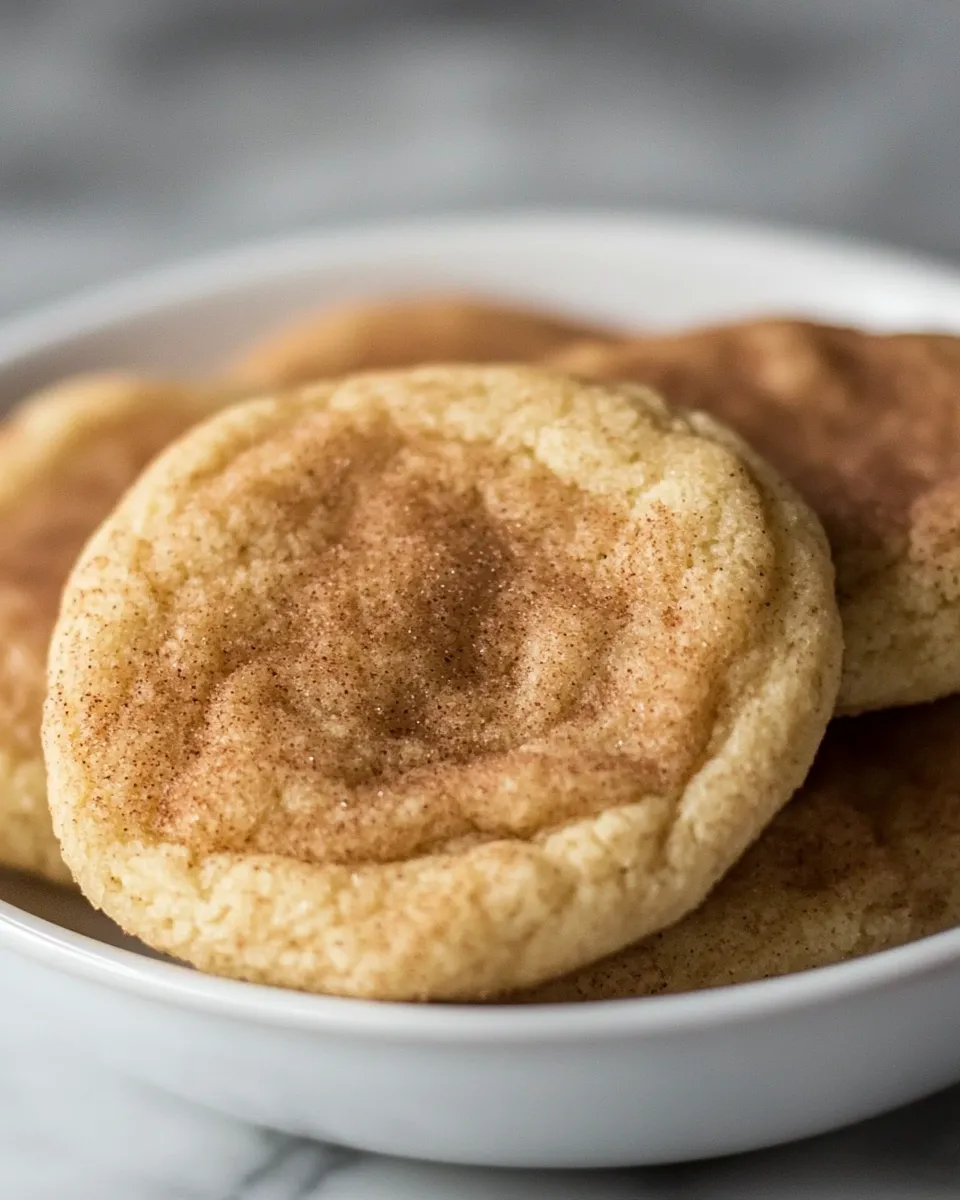
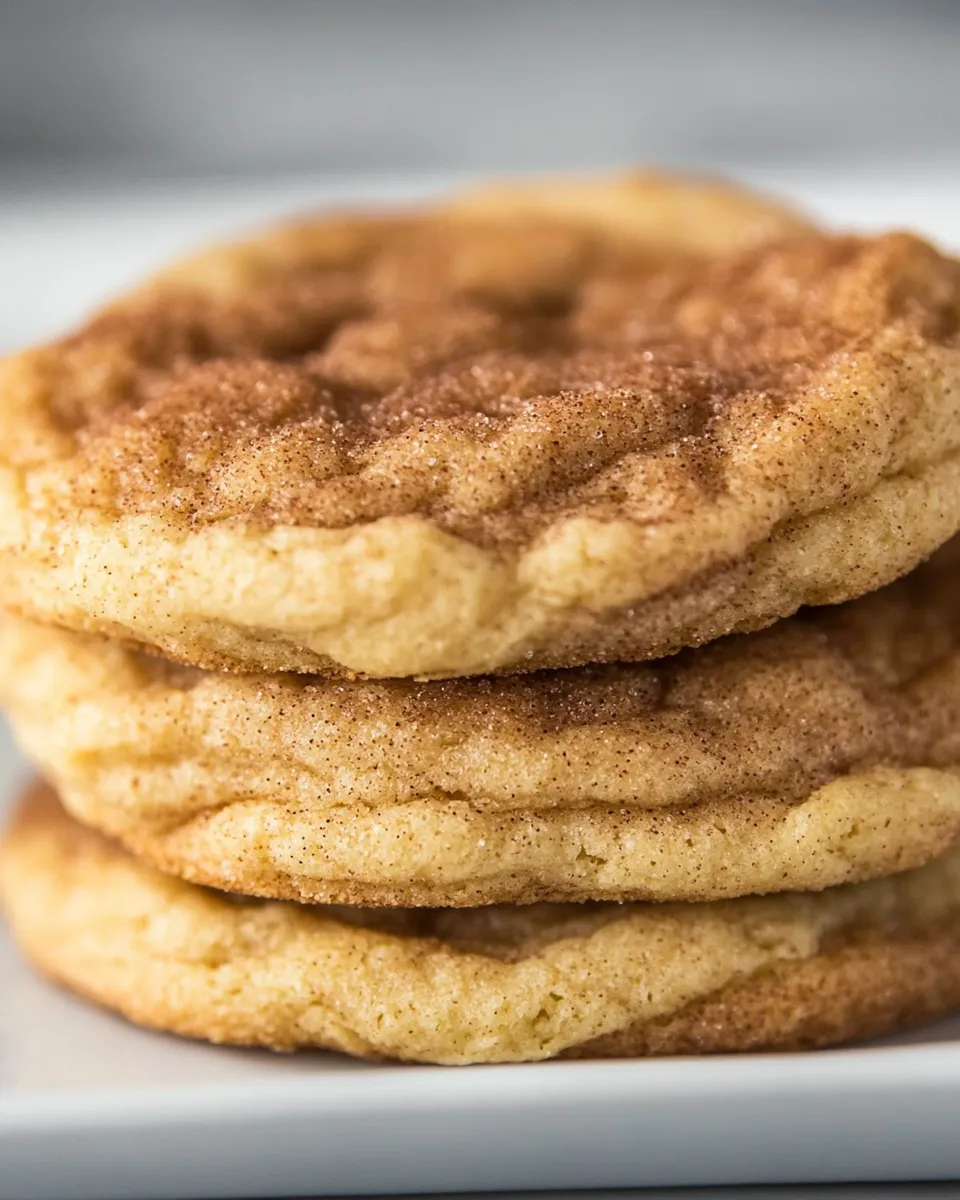
Snickerdoodles are one of those cookies that feel like a small celebration in your hand: crisp edges, soft puffy centers, and a cinnamon-sugar kiss on the outside. I make these on repeat because they’re reliably comforting and forgiving — great for beginner bakers and satisfying for anyone who loves a classic cookie. This version balances butter and shortening for that tender chew with the characteristic tang from cream of tartar.
I keep the process straightforward: mix dry ingredients, cream the fats and sugar, add eggs, fold in the flour, roll, coat, and bake. The timing window is small — 8 to 12 minutes — so you’ll want to watch for edges to set while centers stay soft. The result is worth the attention: slightly cracked domes and a pillowy interior every time.
Below you’ll find an ingredient rundown, step-by-step directions copied exactly so you can follow along without guessing, troubleshooting notes, seasonal ideas, and storage tips. No fluff — just practical guidance to get perfect Snickerdoodles at home.
Ingredient Rundown

- 2½ cups (312.5 g) all-purpose flour — Structure and chew; measure by spooning into the cup and leveling for accuracy.
- 2 teaspoons cream of tartar — Signature tang and that classic snickerdoodle bite; don’t skip it.
- 1 teaspoon baking soda — Provides lift and helps the cookies spread correctly.
- ½ teaspoon (0.5 teaspoon) salt — Balances sweetness and sharpens flavors.
- ½ cup (113.5 g) unsalted butter, softened — Adds flavor and helps create the tender crumb; soften, don’t melt.
- ½ cup (102.5 g) vegetable shortening — Contributes to a soft, chewy interior and keeps cookies tender even after cooling.
- 1½ cups (300 g) sugar — Main sweetener and helps with creaming to incorporate air for lightness.
- 2 eggs — Binders that add richness and help the dough hold together while baking.
- ¼ cup (50 g) granulated sugar — For the coating; gives that crunchy, sweet outer layer.
- 1 tablespoon ground cinnamon — The aromatic component for the coating; fresh ground is best for flavor.
Snickerdoodle, Made Easy
- Preheat the oven to 375°F (190°C). Line three baking sheets with silicone mats or parchment paper.
- In a medium bowl, whisk together 2½ cups (312.5 g) all-purpose flour, 2 teaspoons cream of tartar, 1 teaspoon baking soda, and ½ teaspoon salt until evenly combined.
- Fit a stand mixer with the paddle attachment. Add ½ cup (113.5 g) softened unsalted butter, ½ cup (102.5 g) vegetable shortening, and 1½ cups (300 g) sugar to the mixer bowl. Beat on medium speed until the mixture is light and fluffy, about 3 minutes. Scrape down the bowl as needed.
- With the mixer running on medium-low, add the 2 eggs one at a time, beating each about 30 seconds until incorporated. Scrape down the bowl as needed.
- Reduce the mixer speed to low and slowly add the flour mixture. Mix until just combined, about 30 seconds. Finish mixing by hand with a spatula to ensure no dry flour pockets remain.
- In a small bowl or shallow dish, combine ¼ cup (50 g) granulated sugar and 1 tablespoon ground cinnamon to make the coating.
- Portion the dough using about 2 tablespoons per cookie (or a medium cookie scoop). Roll each portion into a ball, then roll the ball in the cinnamon-sugar to coat.
- Arrange the coated dough balls on the prepared baking sheets, about 8 cookies per sheet, leaving space between them for spreading.
- Bake one sheet at a time in the preheated oven until the edges are just set and beginning to brown but the centers are still soft, puffy, and cracked, 8 to 12 minutes. (The cookies may look slightly underdone between the cracks.)
- Allow the cookies to cool on the baking sheet for 10 minutes, then transfer them to a wire rack to cool completely.
- Store cooled cookies in an airtight container for up to 5 days.
Why You’ll Love This Recipe
This recipe hits the reliable texture trifecta: crisp edges, pillowy centers, and a lightly crackled top. Using both butter and shortening gives you flavor from butter and the soft, tender crumb that shortening provides. Creaming the fats and sugar rather than simply mixing creates a little lift and a finer crumb, while the cream of tartar contributes the tangy note that defines a true snickerdoodle.
It’s also forgiving. The dough is easy to portion and roll, and the baking window is straightforward — you’re watching for visual cues rather than exact second-by-second timing. Even if a batch comes out a touch more browned on the edges, the interiors remain soft if you follow the cool-on-sheet step. Finally, the cinnamon-sugar coating is simple but transformative: it gives each bite a crunchy sweet shell and that warm, spicy aroma.
Dairy-Free/Gluten-Free Swaps
If you need dairy-free: swap the unsalted butter for a dairy-free butter substitute or a firm plant-based margarine, keeping the same volume. The shortening already keeps things tender, so the texture will remain close to the original. Be sure your substitutes are suitable for baking and not spreadable-only margarines with high water content.
If you need gluten-free: use a certified gluten-free 1:1 all-purpose flour blend that contains xanthan gum (or add a small amount according to the blend’s instructions). Because gluten-free flours vary, the dough consistency might feel slightly different; chill briefly if it’s too sticky to scoop. Baking time should be similar, but watch for those visual cues: set edges and puffy cracked centers.
What You’ll Need (Gear)
- Stand mixer with paddle attachment — Recommended for efficient creaming; you can also use a hand mixer.
- Mixing bowls — One medium for dry ingredients and one for the coating.
- Silicone mats or parchment paper — Prevent sticking and promote even bottoms.
- Cookie scoop or tablespoon — For consistent portioning (about 2 tablespoons per cookie).
- Wire rack — For cooling so cookies don’t steam on the hot sheet.
- Spatula and whisk — For folding and combining dry ingredients.
What Not to Do
- Don’t skip the cream of tartar. It’s essential for the flavor and classic tang of a snickerdoodle.
- Don’t overbake. Centers should look slightly underdone between cracks; they finish cooking on the sheet. Overbaked snickerdoodles lose that tender, pillowy interior.
- Don’t use melted butter. The recipe depends on creamed softened butter; melted butter changes spread and texture.
- Don’t crowd the sheet. Leaving space lets cookies spread evenly and bake consistently.
- Don’t skip cooling on the sheet. Moving them too soon or waiting too long can affect texture — 10 minutes is the sweet spot.
Fresh Takes Through the Year
Fall: Add a pinch of ground nutmeg or pumpkin pie spice to the cinnamon-sugar for a warm seasonal twist. Serve with a mug of spiced cider.
Winter: Press a small piece of crystallized ginger into the center before coating for a spicy-sweet contrast, or bake half the batch and sandwich cooled cookies with a thin layer of maple or brown-butter buttercream (if not dairy-free).
Spring/Summer: Keep it simple and bright. Serve snickerdoodles alongside fresh berries or a scoop of vanilla (or dairy-free) ice cream for a nostalgic dessert. For outdoor gatherings, pack them in airtight tins to maintain that soft interior.
Chef’s Rationale
The balance between butter and shortening is deliberate. Butter gives flavor and a slight snap to the edge; shortening keeps the interior soft, even after cooling. Cream of tartar does two jobs: it imparts the classic snickerdoodle tang and reacts with baking soda for the gentle lift that creates those iconic cracked tops. Mixing the dry ingredients separately and adding them slowly prevents gluten overdevelopment while ensuring even distribution of leaveners.
Cinnamon-sugar is minimal but essential — ¼ cup sugar keeps the coating crisp without overpowering the dough. Portioning at about 2 tablespoons yields cookies that bake through in the recommended time and produce the pleasing crack pattern. The rest of the technique is about timing and observation: look for set, slightly browned edges and soft puffy centers, then give them those 10 minutes on the sheet to finish gently.
Shelf Life & Storage
Store cooled cookies in an airtight container for up to 5 days, as stated in the recipe. For best texture, layer with parchment paper to avoid sticking. If you prefer chewier cookies after a day or two, place a slice of bread in the container — it helps retain moisture. To freeze: arrange baked, fully cooled cookies in a single layer on a baking sheet; freeze until solid, then transfer to a freezer bag or container for up to 3 months. Thaw at room temperature; no reheating necessary, though a 5–7 minute stint in a low oven (300°F / 150°C) will refresh crisp edges.
Snickerdoodle FAQs
Why are my snickerdoodles flat? Flat cookies often result from melted butter, overmixed dough, or not using enough structure (flour/cream of tartar). Make sure butter is softened (not melted), mix just until combined, and measure flour accurately.
Can I chill the dough? Yes. Chilling will firm the dough and reduce spread, yielding slightly thicker cookies and a deeper flavor. If chilled, you may need an extra minute or two of baking time. Let the chilled dough warm a minute on the counter if it’s too hard to scoop.
Can I roll the dough in cinnamon-sugar twice? You can for a bolder coating, but the recipe’s specified coating yields a balanced exterior without masking the cookie’s interior flavor.
Do I have to use parchment or silicone? It’s highly recommended. Parchment or silicone prevents sticking and helps cookies bake evenly. Bare baking sheets can cause browning and uneven bottoms.
Make It Tonight
If you want these Snickerdoodles on the table tonight, plan for about 10–15 minutes of active prep, plus 8–12 minutes per baking sheet and 10 minutes cooling on the sheet. That means a single sheet is ready in roughly 30–40 minutes from start to finish. Use your oven rack in the middle position, work with room-temperature eggs and softened butter, and keep an eye on the edges during that 8–12 minute window. Follow the steps exactly, and you’ll have classic, tender Snickerdoodles with a perfect cinnamon-sugar crust by dessert.

The BEST Snickerdoodle Recipe
Ingredients
Ingredients
- 2 1/2 cups 312.5 gall-purpose flour
- 2 teaspoonscream of tartar
- 1 teaspoonbaking soda
- 1/2 teaspoon 0.5 teaspoonsalt
- 1/2 cup 113.5 gunsalted butter, softened
- 1/2 cup 102.5 gvegetable shortening
- 1 1/2 cups 300 gsugar
- 2 eggs
- 1/4 cup 50 ggranulated sugar
- 1 tablespoonground cinnamon
Instructions
Instructions
- Preheat the oven to 375°F (190°C). Line three baking sheets with silicone mats or parchment paper.
- In a medium bowl, whisk together 2½ cups (312.5 g) all-purpose flour, 2 teaspoons cream of tartar, 1 teaspoon baking soda, and ½ teaspoon salt until evenly combined.
- Fit a stand mixer with the paddle attachment. Add ½ cup (113.5 g) softened unsalted butter, ½ cup (102.5 g) vegetable shortening, and 1½ cups (300 g) sugar to the mixer bowl. Beat on medium speed until the mixture is light and fluffy, about 3 minutes. Scrape down the bowl as needed.
- With the mixer running on medium-low, add the 2 eggs one at a time, beating each about 30 seconds until incorporated. Scrape down the bowl as needed.
- Reduce the mixer speed to low and slowly add the flour mixture. Mix until just combined, about 30 seconds. Finish mixing by hand with a spatula to ensure no dry flour pockets remain.
- In a small bowl or shallow dish, combine ¼ cup (50 g) granulated sugar and 1 tablespoon ground cinnamon to make the coating.
- Portion the dough using about 2 tablespoons per cookie (or a medium cookie scoop). Roll each portion into a ball, then roll the ball in the cinnamon-sugar to coat.
- Arrange the coated dough balls on the prepared baking sheets, about 8 cookies per sheet, leaving space between them for spreading.
- Bake one sheet at a time in the preheated oven until the edges are just set and beginning to brown but the centers are still soft, puffy, and cracked, 8 to 12 minutes. (The cookies may look slightly underdone between the cracks.)
- Allow the cookies to cool on the baking sheet for 10 minutes, then transfer them to a wire rack to cool completely.
- Store cooled cookies in an airtight container for up to 5 days.
Equipment
- Stand mixer
- paddle attachment
- Mixing Bowl
- small bowl or shallow dish
- Baking Sheets
- Parchment Paper or Silicone Mats
- Wire Rack
- Cookie scoop or tablespoon


